Showing posts with label 15thC. Show all posts

Sunday, 3 April 2016

Remaking the blue dress - Step 3


I've removed all the hooks and eyes except the two on the waist band. You can see the damage done to the inside of the fabric from the threads in the pic above. I've replaced all the hooks and eyes with lacing rings. I initially had trouble working out how to do this. I had thought of winding my own rings but then I realised if I just butted the ends closed, they'd rotate and pull through the securing threads eventually, or since they are always a little rough, eat through the lacing cord. I then considered soldering a bunch of loops together but it'd be labour intensive, and again, i'd probably end up with rough sections which wouldn't bode will for the long term viability of this dress. I asked around to see where other people source lacing rings. Turns out there's two good options 1) buy them from a medieval retailer who is usually at GNW and Festival for an exorbitant price OR go to my local fishing shop and buy them in packs of 10. This turned out to be a bonus for me because they were having a closing sale so I got two packs for $8.

Not-so-pro tip: Buy lacing rings at your local fishing tackle store and save a bunch!

I haven't tried it on yet as I'm still making the cord I'll use with this dress. I may need to add extra loops if these are too far apart. This was a pretty easy thing to get of my things to do list once I'd actually gotten the rings.

Friday, 22 January 2016

Remaking the blue dress - Step 1 & 2

 Plotting at Great Northern War (2013?)

I've had my blue linen dress for a couple of years. I made it last minute for a tourney and feast in Atlantia. One thing I've always disliked about the dress is the hem was tacked up and contains at least 30cm of additional fabric. While this helps the drape quite a bit, it makes the skirt quite weighty. I also used hooks and eyes as fastenings, which are reasonably unobtrusive against a white chemise but they're not period. They're the good hooks and eyes with the little kink which means they don't pop open but still. Also, the fit isn't quite right. It doesn't hurt my back like my last blue linen dress but the arm holes are slightly too tight and my bust has changed since creation. Lace around a chamise should not be a requirement of wearing a dress.

I considered remaking this dress for Krae Glas's Ehrentag 2015 event but I gave up on the idea because I ran out of time as per usual. Instead of rushing through the remake, I'm going to take my time and hopefully end up with a late period dress I can be happy with. My first task is to fix the hem that's been bothering me for so long.


Task two, find a period reference as inspiration.

Domenico Ghirlandao, Birth of St John the Baptist 1486-90 Cappella Tornabuoni, Santa Maria Novella, Florence

I started the remake by finding something similar in some extant art (above). The reference had to fit the basic features of the current dress - circular neckline, cartridge pleated skirt which starts at the natural waistline and no/detachable sleeves. Thus the new dress will be patterned on late 15th century Italian fashions.

The dress in 15th century Italian, is called a gamurra. There is a nice collection of similar images on a blog called Sophie Stitches. It looks like the come in a range of colours, with or without sleeves which may or may not match the main colour. The dress appears to lace up the front or at the sides. Removing the hooks and eyes and replacing them with a more period approach will be my next step.

Wednesday, 5 December 2012

Necklaces

I went to the Melbourne Bead Show a couple of weekends ago and spent far too much on garnet beads and pearls. Once I got home with my new treasurers I was inspired to make myself some new necklaces. I really wanted to string some pearls to go with my Cranach choker but I found I didn't quite have enough of the right size to make a string as long as I wanted. So I compromised and made some necklaces I'm quite happy with.

I had already strung a garnet and pearl necklace, and a sodalite and pearl necklace a couple of years ago (two on left). I quite liked these because I used small pearl spacers between the garnets and sodalite. I made these before I knew that knotting the string between the pearls stopped them rubbing together and breaking. Since I was out of pearl spacers I decided to make some similar necklaces I could wear as bracelets if I wanted. I used a three garnets, one pearl pattern and tied the string between each stone. I also used a goldish magnetic clasp that I had lying around. This turned out to be a mistake as I now cannot wear any other metallic necklace or earrings with this, as the clasp tries to attach to everything!

The new necklace (front) and the old necklace (back)

Next up was the sodalite necklace. I've used the last of my sodalite stock making a silver hairclip (it jingles nicely) so I substituted what I think might be apatite. The blue is slightly darker but still looks nice. As I didn't have much apatite, I went with three pearls and one apatite bead pattern. I re-used an old cylinder screw clasp as I didn't want to have another necklace that wants to bond to everything!

The new necklace (front) and old necklace (back)

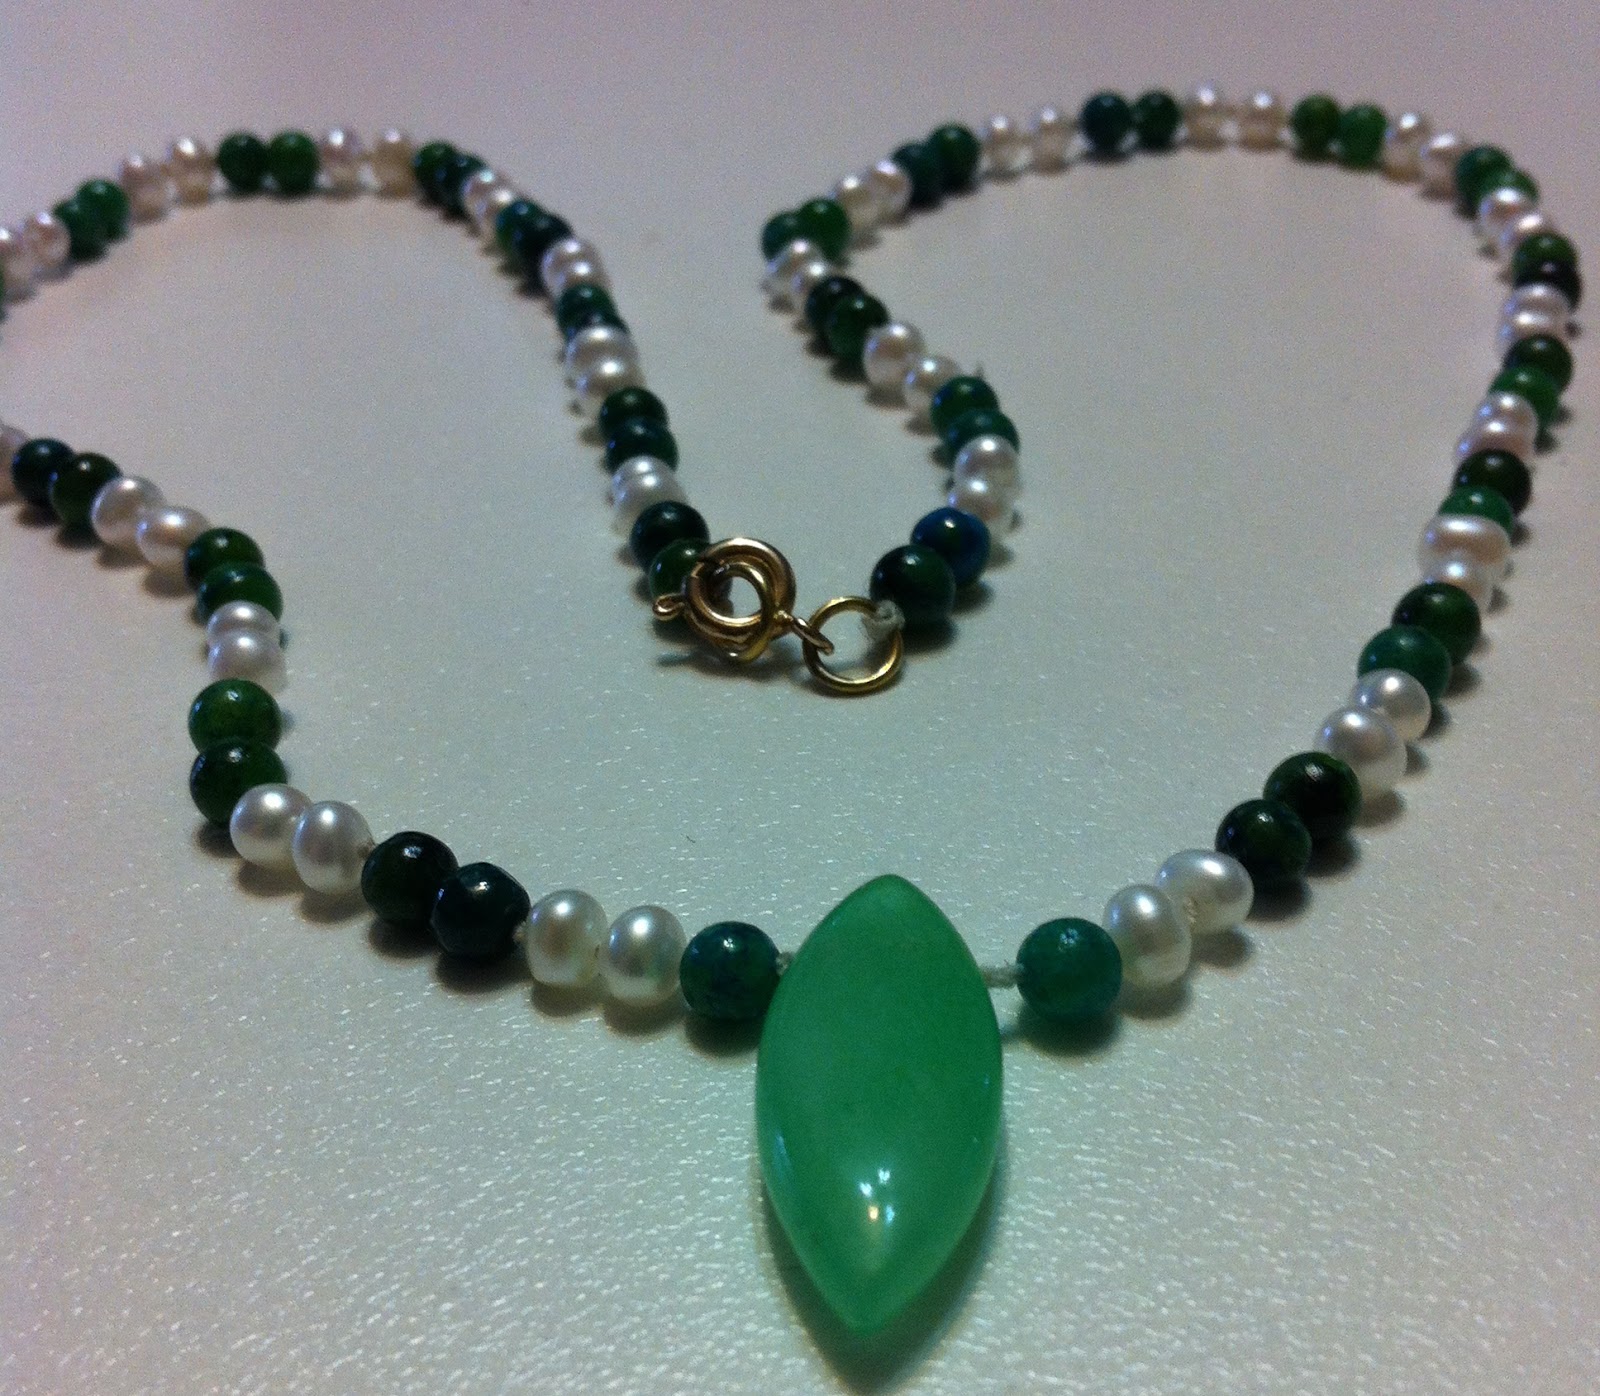
I also have a small stockpile of stone beads that I bought online on a whim many years ago. I got some (probably man-made) chrysocolla type beads from a craft shop last time I visited America and I thought they'd be perfect for a leaf shaped (agate?) pendant bead. I'm really happy with how this one turned out. I can't stop stroking the agate when I wear it as the finish is so very smooth.

Chrysocolla, pearl and agate necklace.

The final necklace I made was actually inspired by a medieval portrait of a Woman by Lorenzo Costa (1460-1535). The original necklace appears to be made of pearls (or tapered gold cylinders) and onyx (or silver beads). It joins just before her neckline and splits off into two sections. This could end as a beaded tassel but I prefer to interpret it as a loop. Mostly because that makes stringing my beads MUCH easier.

Detail of a Portrait of a Woman by Lorenzo Costa.


My necklace is made of onyx and light pink pearls. It has two central focal beads, both onyx, and a simple hook and loop goldish clasp. Though I'm pleased with how this turned out, the lower focal bead is a little too large and it's weight pulls the loop into more of an oval than the circle I wanted. The angles suite the portrait though.

Tuesday, 27 November 2012

van Eyck by Till-Holger Borchert - A Review

van Eyck
Till-Holger Borcher
ISBN 10: 3822856878


Van Eyck is the painter behind the Arnolfini Portrait (1434) which depicts the wedding of a young couple in exquisite detail. His work features many portraits (my main reason for purchasing this book) and a number of religious pieces.  Though only 25 paintings can be attributed to van Eyck, this book details a chronological summary of the artists life and work. The author has also included a number of works that are termed ‘Eyckan’ which could be attributed to van Eyck. The author discusses the history of van Eyck’s style, his use of colour and light as well as his symbolism. Though my interest in this book is primarily in the pictures, the reasonably dense text provides some wonderfully supportive information. With 96 pages containing approximately 100 colour illustrations, I would heartily recommend this book to anyone interested in van Eyck’s work or history. For SCA types, the detail that van Eyck was able to paint is exquisite, the paintings make great references for jewellery and dress accessories.

4/5

Thursday, 11 October 2012

Illumination - November intent to contest I


An attempt at illuminating our intent to enter November Crown letter. The fine black ink lines aren't strait enough and I've screwed up the shading on some of the blue items so I'm not entirely happy with it. I'll be re-doing it with a light green as well as it looks to dark, and the green doesn't match the original close enough. Apart from that, this was an enjoyable learning project for shading. I might apply some of these techniques on my next plate project. Though here the base colour is dark, and when dry, shaded with two lighter colours which won't work with glaze pigments.

Wednesday, 5 September 2012

The Macclesfield Alphabet Book - Review

 The Macclesfield Alphabet Book with introductions by Christopher de Hammel and Patricia Lovett
 ISBN-10: 0712358048

The Macclesfield Alphabet Book is a beautiful 15th century English manuscript which appears to be serve the purpose of a pattern book. It contains a range of alphabets including decorative initials with faces; foliate alphabets; a zoomorphic alphabet of initials, and alphabets in Gothic script. There are also large grotesque initials and a number of different types of borders (see below).

The manuscript was acquired by the British Library in 2009.

Grotesque on page 10


For those interested in reproducing medieval illumination this is an amazing reference. Images range from sketches, to outlines, to coloured peices and gold leafed sections. The range of alphabets has something to suite any work of art. The introduction discusses the Macclesfield Alphabet Book in terms of contemporary scribal work as well as other pattern books. The practitioners introduction has a wonderful discussion of the scribe and his tools. I was quite taken with the step by step process of creating a finished piece.

5/5


Coloured borders on page 45.