Wednesday, 12 November 2014

Southern Belle dress diary - part 4

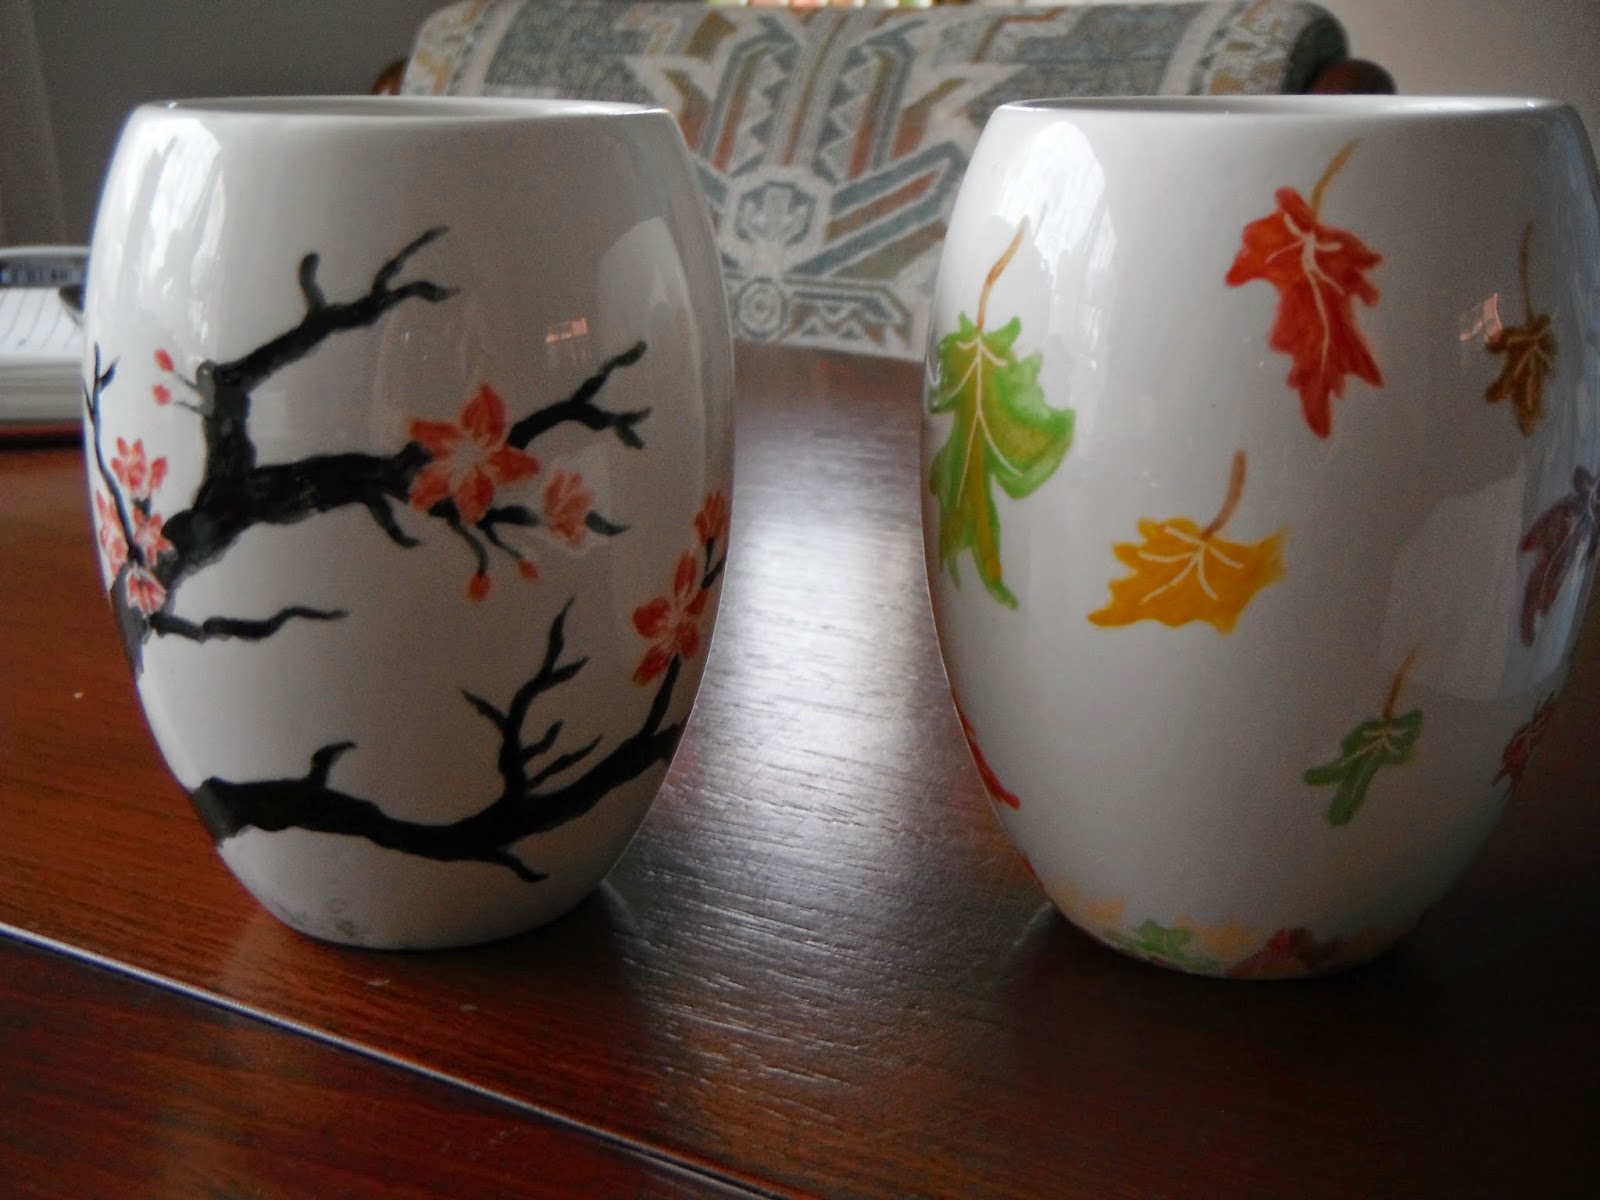
Today I unpicked the entire dress. I've removed the sleeves and separated the skirt, the panniers and petticoat from the bodice. I spent pretty much all day washing the fabric (everything except the tulle). I've also ironed it to try and get most of the creases out. It took forever because I did both the front and the reverse hoping to get it smooth. It's almost there, I'm probably not going to take it further because it'll just collect more when it gets crammed into my baggage so I'll wait until I'm in Queensland until I iron it completly. I've also ironed the 12 meters of blue (artificial?) silk sari that I'll be using for contrasting trim. So much silk-stuff!

The brocade after ironing (left) and before ironing (right) - this is why I went over it two times!


Things done:

Adjust the hoop skirt -
I cut off the waistband of the skirt by cutting off the skirt 8 inches above the top hoop and adding a new waistband made out of random white fabric. As the skirt was originally A-line I needed to gather the fabric in a little. I sewed a straight band to a majority of the skirt and gathered the remainder in the last section before the tie. This pulls against the hoops unevenly, resulting in the hoop sitting closer to the legs and puffing out in the back like so:


Tulle skirt gathered to true waist -
This was a little challenging as both tulle layers had been attached to the bottom of the bodice, as a result it had V shaped dips in the waistband. I started by straight sewing a new 120cm long waistband to the tulle. Given the difference in measurements between my hips and waist and the extra distance added by the V shapes I ended up with a significant overlap. Happily, I could position the frontal V at my front and the two extra 'puff' sections of tulle that used to be for the panniers wrapped around and overlapped at the back giving me better bustle.


I started by over lapping the two sections over each other and attaching three hook and eyes to the side of the waistband. Though this gives me the best bustle, as you can see it's pulling oddly. I tried to fix this by extending the opening all the way down to the ruffled tulle layer but the overlap proved to be too much and was lopsided no matter how I fiddled with it. The bit that under-lapped wouldn't sit flat and kept pulling towards the side with the clips.


In the end I angled the waistband and used three hook and eyes. The extra lengths on each side folded in under the waistband and overlapped themselves like this  ><. The fluff of the bustle wasn't as amazing but it sat right so I went with it.


On a side note - I really don't like tulle, it's so easy to catch your scissors on it and tear it.


Things to do:
Work out right drape for fabric
Determine how to extend bodice with brocade
Placement of blue accents and ruffles
Hand sew in front panel
Sleeves
Neckline

Tuesday, 11 November 2014

Southern Belle dress diary - part 3

Always start a dress from the bottom up, especially if your dress needs supporting garments.

So from the skin up:
Chemise - Check
Drawers (or for me, petticote and modern underwear) - Check
Corset - Check
It's rather challenging lacing yourself into one of these.
I can get my waist to a smooth 70cm without being too uncomfortable.

Crinoline - errr?

I've been pondering using my gold silk corset as it was custom made to my measurements so I know I'll be able to wear it comfortably for hours. The crinoline is also from my costume collection. It's come in handy over the years but for this costume it's simply the wrong shape - it's more 1880's (see below). If I hoike it up so the bottom hoop is around knee high, I'll get more a 1848 silhouette. I really want the 1860, but I don't think I have enough time, fabric or hoop wire to make it.

Image from The Pragmatic Costumer who's blog has some great American Civil War stuff! 


The solution: reuse the petticote stuff from the Marie Antoinette dress (gold skirt draped to provide clear indication of shape). The petticote consists of a liner and a knee length skirt with gathered tulle, an tulle overskirt and four bunches of extra tulle, two on each hip. As I'm shifting the waist of this dress from the hips to the true waist, I've got alot of room to take this in. To get the above silhouette I gathered it in such a way that the sides overlapped at the back resulting in two of those tulle bunches in the bustle zone. I'm rather happy with the resulting shape. It's not the giant bell seen in many of the southern ball gowns but I'm not exactly attending a ball am I?

For extra puff I can add this wrap skirt which I completely forgot I had. It's black so may have to go under the mess of tulle. I'll make that call later though.

Things to do next:
Hoike hoops & make new waist band
Gather tulle and work out closure system
Determine if black skirt needs to be integrated (can the hoops stand the strain?)

Monday, 10 November 2014

Southern Belle dress diary - Part 2

Here is the link to my Pinterest collection of Southern Belle dress inspiration so far.

I have no idea who this lady is, but I love the effective use of colour - delightful!


Today I unpicked the sleeves, the pannier pannels and the main skirt. I'm going to leave the attached petticoat because it's designed to sit lower than the waist of the adapted dress and changing it will mean the bottom hem won't sit right anymore. I don't think this will mess with the fall of the completed skirts.

The unpicking yielded 3.5 meters of plain silk satin and a little over two meters (in two sections) of brocade.

I've decided that this dress is going to be constructed of 1.5 layers. The lining of the current dress will support the petticoats and the finished skirts should slip under the rest of the bodice so it ends up with the right sort of line

I've also been playing around with adding a coloured silk panel to the front to hide the lacing loops, and perhaps some flounces or detailing in the same blue/green shot silk. I've also rustled up some cream lace (both handmade and machine embroidered) and am experimenting with placement.


Lace pointing out (and hiding the piping?) or....

Lace facing in revealing the piping. Lace in helps smooth the bumps left by the lacing loops, but lace facing out appeals to me more.
Hip ruffle - Idea discarded! A ruffle following the waistline of the old dress would work however the new dress has a much higher waistline. The skirt will flare sharply from this waistline to create the bell-skirt. A smaller ruffle at the waist will potentially look silly as it'll be horizontal rather than laying flat.


Sunday, 9 November 2014

Southern Belle dress diary - Part 1

How to make a Southern Belle dress?

Some people visiting this dress diary may have googled "how to sew a Southern Belle Dress" as I did. There are surprisingly few 'how to' guides and I took me at least half an hour to work out why! Let me rewind and start from the start:

I've been invited to a themed birthday party, Wild West, and my character is a western girl pretending to be a Southern Lady. So... I'm from Australia. Melbourne specifically. "Southern Belle" is not at all part of our culture. So I googled it, and googled it and pinterest-ed it and realised what they mean is (American) Civil War (or thereabouts). There are many Civil War patterns available however I currently live a good hour from the nearest fabric store and as semester is over, I'm currently unemployed. So I need to use my patterning skills (limited), my preexisting costumes (some) and my fabric stash (lots) and create something appropriate.

I have two other requirements; it needs to be able to pack down so I can fly with it, and it needs to be cool-ish so I can wear it in muggy Brisbane. I think I'm going to fail on the second one and the first one will be tight so here goes:


This is the base dress I'll be using. It's someones old wedding dress that my sister bought for me from the op shop (American: Thrift Store) for $75. It was probably once whiteish but now it's a nice creamy-ivory colour. I've picked it because it has an excessive amount of fabric in the skirts which are plain heavy satin and a brocade and I doubt I'll be dressing up as Marie Antoinette again.


To make it into a more civil warsy look I need to modify a number of things - waist line needs to be moved to true waist, sides need to be brought in so it works with my corset and I might need to lower the neckline.

One of the problems of using a second hand dress is the make-up stains that came with it. They weren't such a problem for zombie Marie-Antoinette but will be for a clean cut Southern Belle. This stain in particular has ensured the arms will go.

Monday, 3 November 2014

Persona Research - names


So I've been part of the SCA since, um, 2003? In 2009 I stayed with William and Kim while visiting  my co-supervisor in Brisbane and William prevailed upon me to register my heraldry and name. In fact, it was the requirement of his wonderful family hosting me for the week. I knew what I wanted as my heraldry but had no idea about my name. I settled on Travaillie because it sounded like traveler (sort of) and meant something like trouble in French matched the region of my first name which I could then retain. As I'd already spent far too much time without a persona name, I'm sort of got stuck with Ant.

For the last couple of years I've been researching Indian personas and garb and wear Indian to almost every event (weather and fighting permitting) so I've decided I'm going to register an Indian name and device for my eventing persona and retire Antoinette to the back corner with the ceramics.

I want to incorporate 'Ant' because that's what most people call me these days and the lovely Margavati posted a link to a digital translation of The Rajatarangini. Originally written in Sanskrit in 1200 in the Kashmir region, it's recently been translated into English and can be found here. Rather than read the whole thing (577 pages) this weekend I auto-searched for 'ant' and scrolled through tons of "antiquities" and "wants" to find:

60 - "To appreciate Kalhava's merit in this respect it is enough to corn are the pictures he glves us of
personages like Tuiga, Ananta, Harsa, Sussala,"

67 - "Equally impressive is thediscription of Ananta's funeral and the Sati of his consort Sfiryamati" (page 67) - Bugger Ananta is male. (Ananta1s reign (AD. 1028-1063))
123 "the capital of a district of Bellgal, he attracted by deed of great prowess the attention of its king, Jayanta"
124  " Etatnilrara is distinctly mentioned by the poets who obtained fame in the reign of Avantivarman (A,D. 1355-883),"
130 - "Unmattavanti (the mad Avanti ), another son of Piirth~,w ho mas next raised to the throne, appears to have done his best to justify his name."
?? -  "Seventeen ladies of the royal household, among them the chief queen Vasantalelrhs who was a princess of the S'ihi"
117 - "He lived under King Anantadew (10'141064 A.D.) and his son Kasala (1088 A.D.)."
361 - "When one of the Brahmans, instelld of saying, "Well done, 0 king," in his joy spoke unceremoniously, [' Well done, 0 Avantin," he received [from the king] many handfuls."
430 - "Eamantaka, who, in spite of this, had yet for a short time struggled on in the fight, fell from his horse with his sword broken, and was caught alive."
438 - "Also Sumaltomantalra and the other Brahmans, who had taken the gold[of Diddij, were all caught and put into prison by Tunga."
454 - "With praiseworthy brbvery, Anantadeva attacked in person Tribhuvana in the fight, warding off his unerring darts with his sword."
516 - "Vasantalekhri, the king's wife, who belonged t,o the S'ahi family founded Mathas and Agrahkas in the City and at the holy Tripureivara.


And that's it, in 577 pages, two female names containing "ant" and I'm fond of neither.

Thursday, 30 October 2014

Pattern research for silk painted sari

Not amazing resolution, But I Love what the edge of the sari, it looks like dagging, or bling or maybe weights?  Standing Pavati, India, Tamil Nadu, Chola period, 11th century, copper alloy. Accession/museum number 1979.021, Asia Society


Standing Shiva and Parvati, India, Chola period, 13th century. Copper alloy, accession Number 2000.284.5, Met Museum of Art.

 Close-up of Pavati's garment with circular pattern. Centre of one looks like a 5 petal flower while a lower one looks like a swirl.


Not Indian but Indonesian (java). A posthumous portrait of a Queen as Parvati (detail). Eastern Javaneese, 14th century, Andesite, Accession number 2001.407. Met Museum. Her lower garment seems to be 100% decorated in interlocking geometric shapes/overlapping circles. This is possible blockprinted fabric such as that I've posted previously.

Detail of Shiva Seated with Parvati. Nepal (Kathmandu Valley), 10th centiry. Accession number 1983.563. Met Museum. Parvati's lower garment features horizontal stripes with pattern infill very similar to that of the cushion on which they recline (leaves? and flowers?)


Detail of Pavarti. 16th century, Tamil Nadu, India, Bronze. Accession Number 33.65.8. Met Museum. Lower garment is deocrated in a repeating pattern of concentric circles // flowers?


Detail of Shiva, Uma and their son Skanda (Somaskandamurti). Tamil Nadu, early 11th century, copper alloy. Accession number 1982.220.10 Met Museum. Uma's lower garment is decorated in a range of (non-repeating patterns) that feature circles.

Detail of Yashoda with the Infant Krishna. India, Tamil Nadu. early 12th century. Accession number 1982.220.8, Met Museum. Simple by comparison to previous images, this garment features a repeating pattern of dots forming a diamond and a circle linked with a chain of dots - lovely!

Detail of Shiva seated with Uma (Umamaheshvara), Thakuri dynasty, 11th century, Nepal, Copper Alloy. Accession number 1987.218.1. Met Museum. The garment here is badly corroded so I cannot make out much detail from the picture. Her drape appears to go over her shoulder and the lower garment seems to be decorated with small circles ringed by dots.


That's it for now because it's late and I have to work tomorrow.

Tuesday, 28 October 2014

Scribal things #2 - Going green

I hit a minor wall with my celtic scroll the other day. I decided to start with the device and then work out the colour distribution from there. I started by doing a test run of all the colours I currently have so I start with a good idea of what tones match the colours of the original Book of Kells. Then I hit a snag - green. The two greens I had were a light green and a dark green. I needed a brighter mid-green colour. and I don't want to mix my own, because I know inevitably I'll run out right before finishing and won't be able to match the colour. I've talked to a number of other illuminators and most of them remarked on the problems of getting a good green (mostly because they seem to need two coats).

In my travels back and forth this week I decided to acquire myself a range of greens rather than mixing them myself. If I find one I'm happy with this has the benefit of being consistent and I won't run the risk of running out of pigment as I work on this scroll.


These are all of the colours so far (dried) with their brands and colour name written next to them. I was hoping reno art - pale green would work well but like Reeves crimson it's sort of shiny so not suitable for my needs.

Thursday, 23 October 2014

Scribal things #1 - Book of Kells AoA scroll

I'm now a member of the College of Scribes and I have been assigned an AoA to do. This AoA is for a lass who I'm not familiar with. Apparently she likes celtic things so I'm completing one of the Book of Kells blanks for her. The benefit of this is it's all block colours, so reasonably straight forward once I decide on a colour theme.

To start with I've researched the scroll - here's an example of a completed version on the Lochac scribes database. I've googled up all sorts of Book of Kells images (I've misplaced my Book of Kells book in the move) and have found some of the original reference material.

Folio 124r - lion on wikimedia.

and a close up:


And the dog from folio 111(r?)


So the question is: retain the colours of the originals and be all over the shop, or bend to more modern ideals and sort of colour co-ordinate with the device (green and white)?


Sunday, 12 October 2014

St Monicas ceramic class - results

I did a trail run of my ceramic hands-on A&S class at St Monicas during the AGM three weeks ago. I ran this for three reasons, 1. Beth was about to give birth and wanted to make a pair to the octopus cup before the baby came and 2. I plan on running this at Krae Glas and Stormhold and needed to know how to format it. 3. We were having the AGM and it's good to provide quiet crafty activities while the paperwork gets sorted.

6 people ended up painting ceramic objects which I didn't anticipate. 3 cups (Beths is still to be fired) and three tiles (because I had them sitting around). Louisa's skills blew me away (the bamboo) and I especially like the cups by Janet and Vivien. Vee was also interested but couldn't settle on a design, so she's doing research until I run the Krae Glas session.


Pre-firing Post-firing


Things for next time:
  • Bring more bisque if possible - people standing around tend to want to join in.
  • Bring more examples to prevent artists-block
  • Supervise EVERYONE as the concept of "a little glaze" has multiple interpretations.
  • This is not a class for children unless they are supervised by their parents (especially younger ones)
  • Don't buy a pack of pencils just for the 6B, people are likely to utilise the wrong ones accidentally.
  • Don't feel awkward about charging for materials.
  • Explain dark over light shading and three layers multiple times, with examples if possible.
  • Don't plan on doing any work yourself.


Friday, 10 October 2014

Sicilian Acquisitions

The items I bought while in Sicily

The artist is replicating a style of tin-glazed earthenware from Manesis, in Spain such as this example below. I am quite taken with the style and wish I had the funds, and baggage limit to acquire more.


Wednesday, 1 October 2014

Project 36 - Aneala Plates

Another commission from the Crown. Her Majesty requested gifts for the incoming Baron and Baroness of Aneala. Rather than make them items with their personal device (which I'll make for their step down), I thought I'd make them some Baronial regalia. More specifically, plates. I haven't glazed a plate in a while, concentrating more on cups and tiles so I thought it'd be interesting.

I started by documenting a design. This was quite a challenge as I wanted an extant item that displayed heraldry but I couldn't do anything too complex as I had only a month. As it was I picked up the final piece and posted it to Kilic the Thursday before the step up/down. Australia post sucks though, so it didn't arrive in time. Also, thanks to Kilic who bravely agreed to do the random stranger on the phone a favour and accept the package at his house.

Plate (tondino) located in The Met Museum. 1525-30.
Italian, from the workshop of Maestro Giorgio Andreoli. Accession number: 1975.1.1092


I used many of the elements of this plate. I did away with the berries and smaller green tendrils. Originally I was going to paint the side of the plate blue, the background green and the acanthus yellow but I realised that there wasn't sufficient contrast between the yellow and the green so it all became blue. On the back I made concentric circles of yellow (centre), blue/turquoise, and green. I tried to replicate the white highlights by scratching white lines in but the yellow isn't orange enough to make the contrast sufficient in this image. I'm not 100% happy with these plates (will I ever be?) but on the upside, Aneala now has baronial plates that are microwave and dishwasher safe. One Barony down, many to go.

Completed plates. Left - prefired, right - post firing.

Tuesday, 30 September 2014

Reannag Teine

An Atlantia I know, Glaukos the Athenian linked an interesting site on the book of faces today - a pottery studio in California which seems to specialise in SCA stuff. Seems they need votes to qualify for a local grant so they can expand their studio. I totally support artists like this (and wish I could buy more of their work). I've attempted to vote for them to receive this grant but it doesn't want to let me, possibly because I'm Australian? Anyway, the voting at this stage is just to get them to consideration. From the bios of the past winners, they're up against a challenge and really need to sell their product, their research and their involvement in the community.

http://www.reannagteine.com/

This family team in California are doing many of the things I'd like to try. They have the advantage of being a team, and having a resident potter. Their designs are lovely and I cannot believe how cheap they are selling some of their products for!


Their attempt at the 1480 Faenza Peacock (on right)

Saturday, 20 September 2014

Project 35 - Aneala cups

Hey there, long time no post!
I've been working on some gifties recently, so haven't been able to post progression pics or really anything until after they've been handed over. So ceramic project number 35: Aneala cups.

HRM Liaden asked me to make some items for the Baron and Baroness of Aneala who are stepping down today (this post is specifically scheduled so as not to ruin the surprise). The Baron and Baroness are Kilic ibn Sungur ibn al-Kazganci al-Turhani   and   Branwen of Werchesvorde. Given they're on the opposite side of the country (it'd take me at least two days to drive there), I don't really know these folk. So I turned to the trusty internets. (turns out they're both Laurels - eep)

First up I googled Branwen of Werchesvorde. From the Lochac Laurels website "Member for roughly 25 years, Current Baroness of the Barony of Aneala. Master Rank in the College of Scribes, holds Scribal classes in corrupting novice scribes. Is married to the wonderful Dede (Master) Kilic who has in turn corrupted her into Middle Eastern culture. Master Rank in the Lochac Cook’s Guild.
Her Excellency Baroness Mistress Branwen is highly active in the scribal arts, and has interests in Middle-Eastern culture and pavilion-making, textiles as in weaving, dyeing and printing, learning embroidery, leatherworking, glass bead making."

Generic middle eastern - perhaps I could make some more of the lovely Iranian things I've been contemplating?

To see if I could get something more specific I googled Kilic and happily I found a bunch of information on his persona. From the Aneala website: "Kilic ibn Sungur ibn al-Kazganci al-Turhani is a Turkic nomad from the Early 13th Century. Kilic was bought from his parents at market in Samarkand and raised as a Ghulam or slave soldier. He served his master well and when his master passed away took service with a number of different rulers, warrior lords and merchants particularly in the unsettled regions of Rum. Like any good nomad he has become a jack of all trades and has tried his hand at various crafts including woodwork, leatherwork, metalwork, armouring, tent making, cooking and hats – definitely likes hats."

And from the Lochal Laurel website " Kilic is a 13th centruy ghulam serving one of the lesser Amirs in the Artuqid empire. He divides his time between the court of one of the beglerbegs and various skirmishes and campaigns. He prefers the latter as he considers the courtly life to be for those who have lost the will to live. At the moment he is looking to acquire some land and settle down, although not too settled. He knows more than is humanly safe about all things Middle Eastern and gets accused of being a walking reference library at least once a week."

I knew Kilic didn't represent any of the ceramic work I'd done so far so I started researching Seljuk and Artuqid. From the very short article on Wikipedia (yes, I know that's not real research), I determined that Kilic would have originated from the Harput branch (later in period. I then started researching 13th century Turkish ceramics with a vengeance and landed on the work originating from Port St Symeon.


This bowl is lovely and is perfect for Kiric's persona there are but two problems. One; I had a rather limited project time, so carving two bowls like this before glazing wouldn't be viable. It'd be totally easy if I made my own bisque, but I don't, yet. Problem two; Alex the Potter already makes this style of ceramic and I don't want to be stepping on his toes. So, that put a stop to items that'd suit Kiric.

So I was stuck. Her Majesty originally wanted a matched set for each of the B&B's. Given I'm organising an event and attending badger retreat, I don't have that sort of time. For the Kilic and Branwen I decided to go with the cups that I've been doing lately. They're perfect for tea and while may not match their current feasting kit, will come in handy for longer events. I decided to go with something I know they'd like - their own heraldry. I've documented heraldry on cups for later periods and more western locals. Given that I'm turning away from a 100% period piece, I decided to do a symbolic piece.

I downloaded their heraldry from the Lochac Roll of Arms (Thanks Master William!) and set about making the cups. I wanted the heraldry to take up as much of the space of possible so used the same shield template I had for Aliette's cup. I added some swan supports (for Aneala / Western Australia) and some trailing acanthus leaves. I had considered having the swans wearing baronial coronets around their necks, but thought that wouldn't quite work.


Branwen's heraldry:
Per pale azure and gules,a raven within an annulet argent.
Kirik's heraldry:
Sable, a sheaf of five swords argent within aorle Or.

Branwen's cup with swan supporters at base. The acanthus are counterchanged so they retain contrast with the body of the shield.


 A slightly blurry image of the two cups.

I'm rather happy with how these cups turned out even if the backs are blank. There will be no mistaking who owns these and even though they aren't middle eastern, I hope their recipients are pleased with them.

Thursday, 14 August 2014

Things in the Rijks Museum

Dragon Jug featuring plumed pidgeon.

Plates!

Painted glass jug