
a) Triceratops trial.
I thought I'd share my process for the geometric dinosaurs I've been playing with this last year. It's quite straightforward if you follow some basic rules:
- No curves
- No partial terminations.
- Triangles must orientate with the direction of texture flow
I start by drawing the outline of the beastie, curves and all. If you can't freehand, that's okay. Turn your screen brightness up all the way, find an image with good contrast and trace the sucker. If you've read Flatland: A romance of many dimensions, you'll know that a curve is just a sequence of very small flat lines. The easiest way to work out where to put your triangles is to go along your outline and place a node (dot/point) everywhere you feel you'll need to start turning a corner. Connect the nodes to create triangles. As a general rule, humans prefer the look of an equilateral triangle, followed by an isosceles. Avoid scalene triangles unless absolutely necessary.
Use large triangles in areas that would be smooth or flat on the original object, like the triceratops back. Smaller triangles can be used in place of shading or to emphasis a feature, like i have done with the eye.
If you sketch the plan before painting you're less likely to make geometrical mistakes however they do happen.
 |
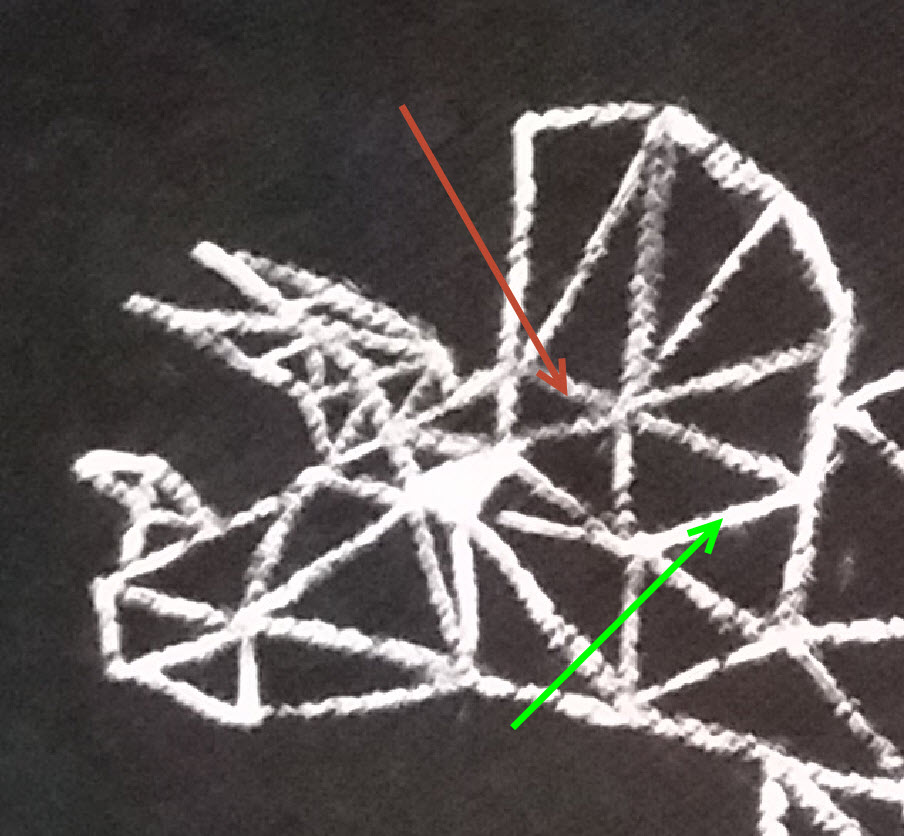 |
| b) Rule 2 - No partial terminations | c) red - better alignment of frill triangles. green - poor use of orientation for termination of frill |
In image b there are two partial terminations, one used well, the other not so much. In the first case, by using partial terminations I've been able to distinguish the frill from the neck creating a sort sliced triangle. This works well because it creates a perceived depth to the beasties head. The other example, highlighted by the red arrow is a last minute mistake. I'd created the frill incorrectly, using radiating triangles. When I came to the base of the frill I a small trapizoid to fill in. I should have used a NE diagonal to make two triangles instead I've made a partial node and a mess.
The second triceratops (c) has a nicer fore-head / frill zone (red) as I did away with the radiating triangles. It does suffer from a lack of definition between the neck and frill (green) as I've used my neck partial node badly. All things considered, I do prefer attempt 2.
Once you have a happy outline on paper, cut it out and use a pin to make largish holes in the main nodes. Squirt a small amount of talc onto your pattern piece and brush it off in such a way that it outlines your pattern when removed. You'll find a small amount of talc will drop though the pin holes and mark your nodes. Grab a rounded brush and some screen printing paint and have at it.
A final thought - keep in mind the scale of your image when determining how many nodes you need. I feel the triangle density in the triceratops heads are pushing the line width ratio a little. I'll have to start using a thicker pen when testing my design to ensure I don't have this problem when I start painting.
No comments:
Post a Comment