
Showing posts with label Still Learning. Show all posts
Showing posts with label Still Learning. Show all posts
Monday, 1 June 2020
Making an impression
While rummaging around in my tool drawer trying to ring the right screwdriver I happened upon a leather stamp I’d bought years ago and never used. I wondered if it’d work well on clay and since I had a slightly less than leather hard cup just sitting there I tried it out. This cup will have sea green base with translucent green rim which will hopefully run and fill the leaves nicely. If this works it’ll open up a whole range of stamping options for me since these would also look good impressed into little clay buttons attached to a cup.


Sunday, 3 April 2016
Remaking the blue dress - Step 3

I've removed all the hooks and eyes except the two on the waist band. You can see the damage done to the inside of the fabric from the threads in the pic above. I've replaced all the hooks and eyes with lacing rings. I initially had trouble working out how to do this. I had thought of winding my own rings but then I realised if I just butted the ends closed, they'd rotate and pull through the securing threads eventually, or since they are always a little rough, eat through the lacing cord. I then considered soldering a bunch of loops together but it'd be labour intensive, and again, i'd probably end up with rough sections which wouldn't bode will for the long term viability of this dress. I asked around to see where other people source lacing rings. Turns out there's two good options 1) buy them from a medieval retailer who is usually at GNW and Festival for an exorbitant price OR go to my local fishing shop and buy them in packs of 10. This turned out to be a bonus for me because they were having a closing sale so I got two packs for $8.
Not-so-pro tip: Buy lacing rings at your local fishing tackle store and save a bunch!
I haven't tried it on yet as I'm still making the cord I'll use with this dress. I may need to add extra loops if these are too far apart. This was a pretty easy thing to get of my things to do list once I'd actually gotten the rings.
Friday, 26 December 2014
Schoodie / Squoodie
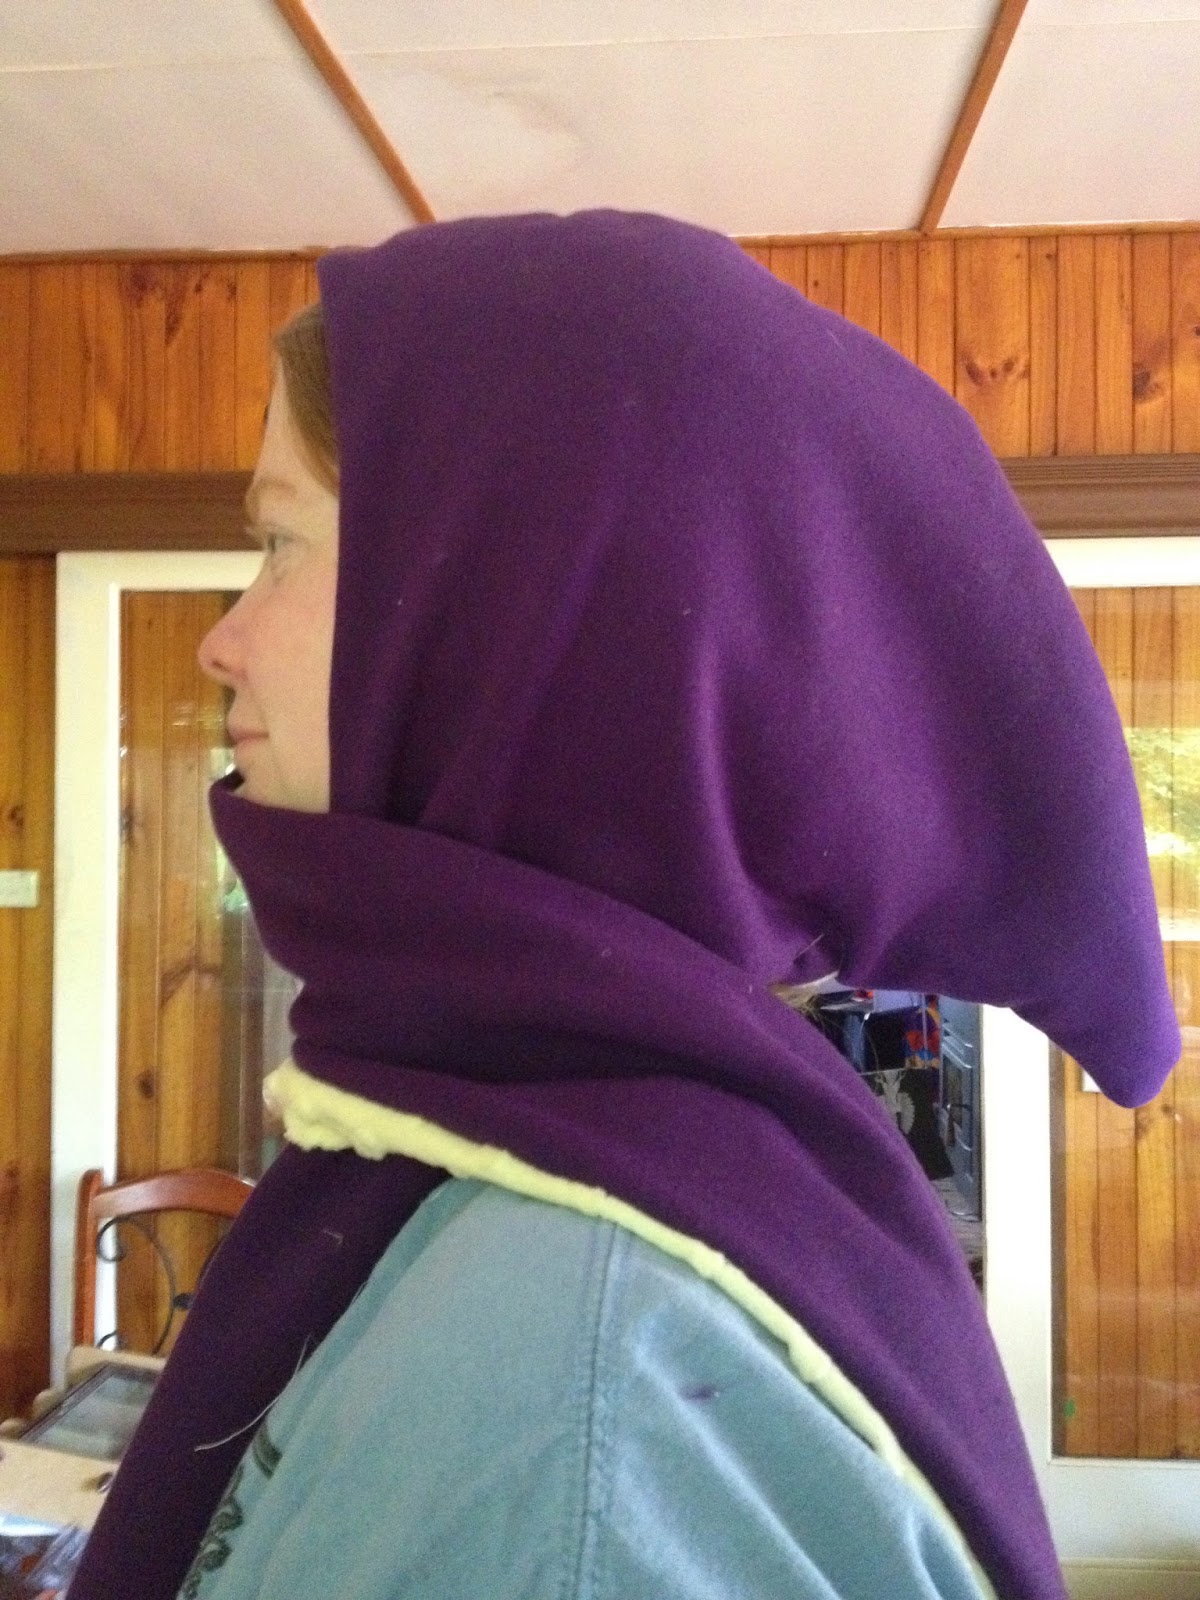
Schoodie - a combination scarf / hoodie
Squoodie - a combination scarf / hoodie with a squid theme
So, I didn't know schoodies were a thing until I went to Tobin's November Stitch and Bitch day. Apparently they are and my favorite Youtube channel, Threadbanger, has even done a short instructional video on how to make one out of an old sweatshirt (jumper) here. Tobin kindly lent me his pattern which he seems to have printed off the internets. I'm not sure where he got it but this seems like a rather simple three piece pattern which I may make next time. You can also get a ton of free patterns for knit or crochet patterns for scoodies simply by googling it.
I made the schoodies in November as a gift for my man who's currently contracted out to work in the sandbox. As it's winter over there (a cold Christmas - what a barbaric idea!), I thought I'd make him something to keep him warm. I scheduled this to auto-post after Christmas so as not to ruin the surprise!
To make - follow these helpful instructions on Indie Tutes OR:

(pattern shown here is schoodie (with ears) not Squoodie)
1. Cut out your fabric.
Make sure you have 2x outer-shell, 2x inner-shell, 2x outer pocket pieces, 2x inner-pocket pieces cut in opposite directions.
When cutting the fabric be aware of the grain. Like fur, my bumpy fabric for the liner has a grain so I had to ensure that the pattern was cut to ensure the grain went down the tentacle. This means I needed 1.2m of liner fabric but only about 0.7m of outer shell.

I elongated the outer-shell of the hoodie to create the hood shape. I left the inner-shell according to pattern to ensure the hood wouldn't slip over my mans face.

2. Pin the pockets rightside to right side and sew along top.
I decided to use the non-fluffy side of my fleece as the good or right side of the fabric so I pinned the non-fluffy side of the purple fabric to the fluffy side of the cream.

3. Turn over the pockets and pin along top to hold in place (if using cottons, you can iron the seam to hold it flat)
4. Pin pocket pieces in.
Pin in such a way that you can't see the colour difference (when you're done sewing this results in colour matching the pockets to the tentacles)

5. Start pinning squoodie together from the center front seam (right sides together)
Use ALOT of pins! I used pins ever inch or so. Fabric with nap like fur tends to slide on the fabric and will stretch and bunch if you're not careful. If you have one (which I don't) a walking foot may help

6. Sew
Sew from the center back along one tentacle.
At this point I decided I wanted to have a slight taper before the pockets to create more of a tentacle shape. I drew it in with water erasable fabric marker and sewed along the line
Keep sewing until you reach almost to the back again. Leave a hand sized gap.

7. Pull through and flatten.
DO NOT freak out if you end up with one pocket on the inside and one on the outside, simply pop the point back through and move the pocket to the side you want (your hood is actually fully reversible yay!)
8. Hand sew gap closed (or machine if you've got time restrictions and don't mind a weird seam at the back)
Adaptions:
I elongated the original hood to make a squid look. By sewing in a tight angle at the center back of the hood between the lining and the outer-shell I pinched the fabric in such a way that pulled the hood down to rest in an appropriate manner.
I considered sewing squid-eyes onto the hood but I didn't want to make it too cutesy.
If you can't find bumpy fabric like mine, consider appliqueing suckers onto the inner-shell tentacles.
If you're using fleece, you could add a quarter circle of fleece to drape out of the back of the hood. The fleece won't fray and you can slice it into tentacle shapes. Make sure this is sewn in so the stretch direction is down along the tentacles. Pull the tentacles to make them curl along the edges a little to hide the rawness.
It'd be entirely possible to elongate the hood to an extreme lire-pipe length for a pixie look.
Ears can be hand-sewn separately onto the hood, rounded ones for bears or pointy ones for a fox/dog.
Paw prints could be added to the outside of the pockets prior to sewing them in.
Subscribe to:
Posts (Atom)