Showing posts with label Embroidery. Show all posts

Wednesday, 14 August 2019

German embroidery design 1535


Embroidery chart by Christian Egenolff. 1535. Germany. The Met Museum accession number: 33.69(4r)

I really like the zig-zag and sort of trefoils of this pattern. The chart really strongly reminds me of a Mamluk pattern currently residing in the Ashmolean. I'm not sure what I'd use this on though as the best effect would come from repeating the pattern which would create quite a wide band.

Linen embroidered with blue flax. 10th-15th century. Fustat, Egypt. Ashmolean Museum. EA1984.560


Wednesday, 15 May 2019

German embroidery pattern 1535

Embroidery chart by Christian Egenolff. 1535. Germany. The Met Museum accession number: 33.69(4r)

I'm not sure where I'd use this design. The width may work for both collar and cuffs for a landsknecht shirt. I'm not overly taken with the design but it does remind me of some of the beautiful mumluk patterns.

Wednesday, 13 February 2019

German embroidery chart 1535

Embroidery chart by Christian Egenolff. 1535. Germany. The Met Museum accession number: 33.69(4r)

I love this embroidery chart. It looks like carnations and an iris. It'd be quite simple to loop this around and around a Landsknecht collar or cuffs. The design on the left, I can't decide if it's bells or acorns or some sort of pod on a vine.

Thursday, 3 January 2019

Hood idea II

Yesterday I published a picture of a hood I'd like to make as I'm quite taken with the ears. I've now found something equally great! Below is an image of a 1535 German design book by Christian Egenolff. The designs seem to cover a great many applications. Some are clearly embroidery charts, others appear to be engraving or carving where rounded lines are utilised. I found the image below on a page of embroidery designs. Though this image has a few rounded lines, I believe the cubic format is intended for embroidery.

The chart features two fools conversing in a garden surrounded by sun flowers. In front of them a wattle fence keeps them penned in. The alignment of the left most flower and fence post and right most flower and fence post suggests this pattern could be repeated with ease. Now I'm torn, should I embroider this along the base of my hood or as shirt cuffs?

Modelbuch aller Art Nehens vn Stickens by Christian Egenolff. 1535. Germany. The Met Museum. Accession number: 33.69(4v)

Wednesday, 7 June 2017

Pelican Outfil #5 - Test collar & dress

I got so heavily involved in making the outfit, I never actually completed the outfit diary. The 1st anniversary of my Pelicaning is fast approaching, so here it is:

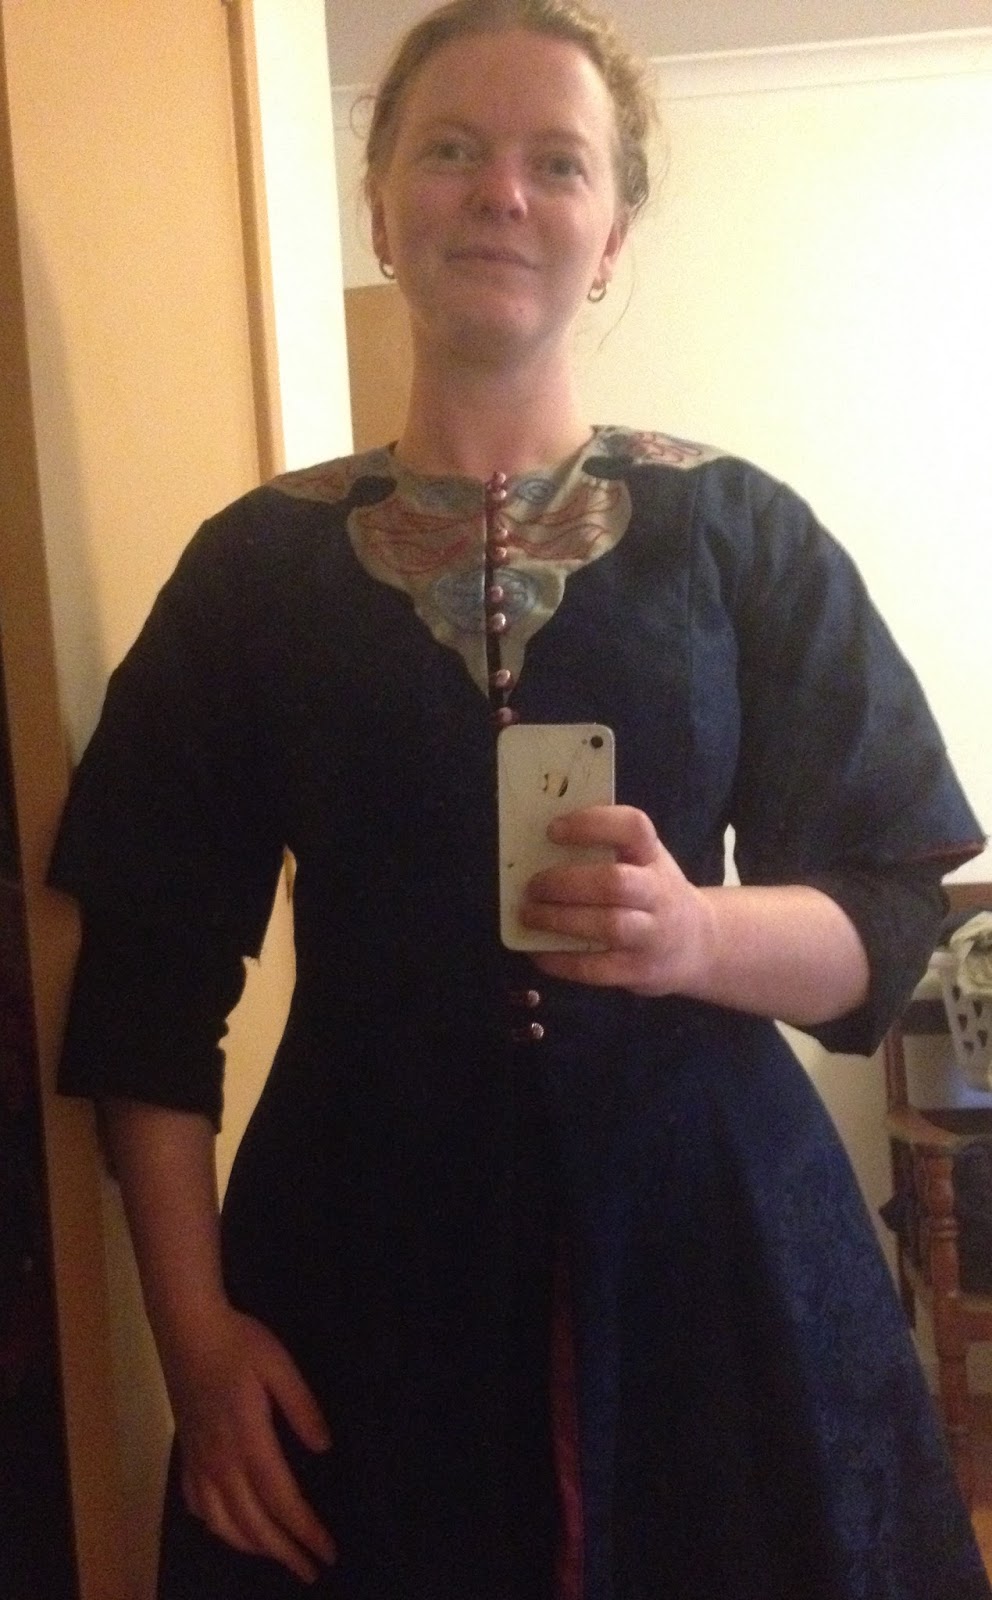
I made another test piece with a dark blue brocade (with modern roses). I designed a collar of silver silk with red and blue silk embroidery. The intent of this was to test our my patterning skills, my embroidery skills and to create a backup outfit just in case I didn't get the final one done in time. In the end, the Lovely Iglasia wore the backup and we looked fantastic!

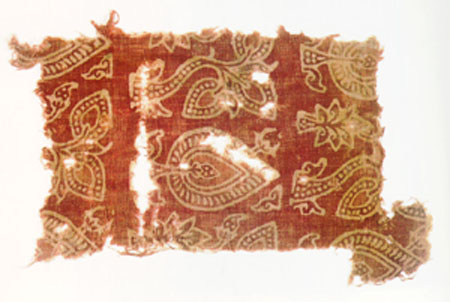
The embroidery was a simple design based on some of the pottery I'd been working on. I started by tracing my collar pattern onto the silk using a washable marker pen. I included a seam allowance and then free-handed the design. Once I was happy with the design, I simply tensioned it using a cane hoop and split stitched my way around each of the symbols and created

Once the embroidery was complete. I cut out the pattern with my sharpest scissors and sealed the edges very carefully with Fray Blocker. This made the edges a little crispy but it was worth the effort to ensure that the applique doesn't fray and lift of the dress.


I'm aware that many of the extant images show the collar crossing the shoulder tip however I'm not very good with attaching sleeves so wanted to leave my options open. As a result, the collar just kisses the sleeve seam. I pinned it down and then sewed in the lining. The meant the collar and front opening would be as tidy as possible. I then folded the rest of the seam allowance under, and invisi-stitched the whole thing down.


Buttons for the dress were created by wrapping silver coloured ripple beads in the same colour silk thread. A small bead was used as an anchor and I created a pin with my trusty long nose pliers.

Here I am in the finished dress feeling quite smug about what my limited sewing skills can produce. I quite like how fitted this dress is to my bust without being restrictive. These photos also made me decide to wear a lighter coloured under-tunic on the day as the black sleeves don't contrast well.


The key challenges with this collar revolved around finding a way to stop the silk from fraying. Fray Blocker works but needs to be applied with a brush or toothpick otherwise too much and it'll leech into the silk and darken / stiffen it. Silk that's been saturated in Fraw-blocker won't be easy to puncture with a sewing needle so it's importing to ensure it doesn't take up all of your seam allowance.


Sunday, 14 February 2016

Octopus embroidery


When  Beth and Gib won crown I was so excited for them. Like anyone in their circle of friends I was bursting with ideas, and suggestions and opinions. I quickly realised that they'd be getting advice from -everyone- and I should just channel my energy and excitement into something actually possibly useful. I started these the day they won, and finished them after my move to Perth had me spending Christmas alone. It's been a while since I embroidered anything and I'm rather pleased with how these came out. I designed them myself to make a sort of knot work octopus. I have no idea what they might be used for, I thought perhaps they could be appliqued to a bag or something for the ladies in waiting to carry around. Or maybe on some cute small child garb?

Thursday, 3 October 2013

Embroidered cushion Mk II - Complete


I finished the embroidery on this cushion a couple of weeks ago, it just took me a while to get the zip in and finish the sewing. I've completed this just in time too, I'm moving house soon so everything is in packing chaos and I've found so many UFO's I'm being buried by the pile! I fixed the zip issue with this one by using a 59 cm long zip rather than a 61cm one. The pillow fits well in the case and is just squishy enough. It goes nicely with the first one too (which you can just make out in the background). I still haven't bought a walking foot so I'm not going to try sewing gorget again anytime soon.

I'm really happy with how some of the squares turned out. I'm especially happy with the argyle sort of one (top left), the check (upper right middle) and the circles (lower left). The design I'm most happy with is the spiral (image below). I got the idea from Dimity's Fibre Adventures, a blog I stumbled upon when looking for examples of button hole stitch. Her spiral was made with buttonhole stitch and beads. I didn't incorporate the beads, lord knows I have plenty) because I don't want bead patterns on my face when I nap on this cushion. I also like the texture of the larger stitches and I didn't want glass or plastic interfering with that.
I made my spiral by sewing the spiral in running stitch. Then I went back and made each stitch a square U shape and placed a long stitch between them.


Though I've got to finish some items from my UFO pile, I'm thinking of making more experimental cushions.  Suggestions are always welcome!

Friday, 13 September 2013

Embroidered cushion Mk II


Japanese fabric (?) I found on flicker, so simple and effective.

Since making the previous mint cushion, I've been pondering more cushions. Ideally I'd love to have a pile of them to flop on in front of the heater. As I had plenty of mint green bed-sheet left over after my previous cushion attempt, I decided to make another green cushion. This time I've taken my inspiration from two sources, a blog by ArtisticFingers who makes the most beautiful embroidered items and the image above.

I started by cutting out section of cloth with 5cm allowance on each side. Then I divided it into squares with coarse stitches. Since then I've been filling in the blocks in alternatively with whatever pattern appeals to me on the day I start. I have completed five squares so far. I'm not entirly happy how some of the patterns turned out, but I also don't dislike them enough to unpick them. I am really loving the texture of this cushion so far.

(The fabric is a little crumpled, because I took it to Bairnsdale on Friday so I could work on it between classes.)


------

Additional:  I'm down to four more squares and I'm running out of ideas. Generally, I'm trying for geometric patterns. I even unpicked a sort of star field because it didn't really fit the theme. Suggestions are welcome!

Saturday, 22 December 2012

UFO - Embroidered rainbow cushion

So this UFO has been around for about 9 years, I think I started working on it when I was living in Briarwood. This started as a practice piece so I could try some different embroidery styles before working on a quilt project in the planning. I browsed a number of embroidery dictionaries and attempted some of the stitches that I liked the look of. The embroidery has been complete for years, the two things holding up this project were the zip, and a cushion insert. I've never been very good at zips and it's only in the last few years that I've had a zipper foot for my machine. So this cushion has been buried in one of my unfinished project boxes for quite some time. I unburied it during the giant fabric sort of 2012 and have FINALLY finished it. The UFO originally had a border of calico with coloured corners but didn't fit the insert I bought from Spotlight so I unpicked it. The back is plain calico. I stumbled upon a zip tutorial via Pinterest which inspired me to finally finish this one...

Weave Stitch otherwise known as Queen Anne Stitch. Sewn on an angle to make following the curves easier. Each block is counter changed (i.e red with blue or green).


The finished cushion - yay!

addendum: I probably won't make another embroidery cushion. This one leaves the oddest imprints in my face when I sleep on it.

Sunday, 16 September 2012

Paisley Roundup II

I'm still collecting ideas for my aari work. Paisley type motifs seem to be very popular even though I haven't found all that many dependable documented items. These three are a little dodgy on the dates but are still quite nice.


An old Ajrakh block-printed piece from Sindh, Pakistan in the V&A collection. I haven't been able to find it myself. I'm not sure how 'old' is old. I like the circular motif even though it's not a paisley.


(Original) From Riches to Rags: Indian Block-Printed Textiles Traded to Egypt 13th- to 17th-century Indian cotton trade textiles found in Egyptian sites. I've replicated the 'tree motif' which is quite a nice paisley too.


 (Original) From Riches to Rags: Indian Block-Printed Textiles Traded to Egypt 13th- to 17th-century Indian cotton trade textiles found in Egyptian sites. A simple teardrop paisley.

Wednesday, 12 September 2012

Paisley roundup I

I've started researching designs for aari work. There are many ideas out there but not so many medieval examples that I've found. For my first few samplers I'm going to think small so I've setteled on paisley / mango patterns which seemed popular in medieval India.


(above) A material fragement from Kelsey Museum of Archaeology. From: Indian Block-Printed Textiles Traded to Egypt 13th- to 17th-century Indian cotton trade textiles found in Egyptian sites Exhibit. No date is stated. It seems the Kelsey Museum is rather poor at showing dates for online items.

I've patterened four different motifs from this fabric, three paisley type  items, which when viewed in context are more likely representing trees and plants, and a rondel sort of thing. Stay tuned for more randomly inspired paisley patterns!


Monday, 10 September 2012

Aari embroidery patterns

I've been researching aari embroidery patterns. I've found a whole bunch of modern designs and designs created by various bloggers but not much in the way of medieval designs.

An Indian Heritage site has a number of simple motifs, however I'm not sure how old 'heritage' is.


I quite like these three designs. I think they'd make nice simple cuffs or trim on something.

To fix the apparent drought of medieval designs, I've started downloading documented images of cave paintings and such and copying out the designs. More on that to come.

Thursday, 30 August 2012

Zari work

I'm feeling very excited about something new I found which combined my interest in sari's and embroidery. I've always wanted to make my own fancy sari but it always seems like so much work to embroider 5-6 meters of fabic like that. I've just found some modern references to a more traditional way of making beautiful saris.


There are some not-so-well produced videos that show exactly what I'm talking about on Expert Village.

Rainy days of ilampirai has some fuzzy but inspirational step by step instructions for different patterns.

Most importantly, Embroideryaddict, not only has some amazing projects on her blog, she also adds a few more names to the aari needle / zari needle confusion - it's also known as a tambour hook or in French 'Point de Beauvais'.

Monday, 27 August 2012

Blackwork ideas


From: Merlange, Germain.  Catalog of the Elsberg Collection of Egypto-Arabic Embroideries of the Mediaeval Period, The Bulletin of the Needle and Bobbin Club, Vol. 12, No. 1 (1928), #3

Image shows an image of a man riding a horse with what could be a falcon riding on his wrist. Egypto-Arabic. 9th-10th C. Found in Fayoum.