Sunday 30 November 2014

Gifted Napkin


I received this from Lady Aleinya Thrakesina (aka Vicky)  at Fields of Gold IV. She taught a weaving class and this was one of her demonstration pieces. It's woven on a two heddle table loom and is lovely. I still have to full it (however you do that) but I'm quite taken with it. She also made some beautifully textured ones for their Majesties on a four heddle loom but I didn't get a picture of them.
I drifted past her class multiple times during the day because the weaving process has fascinated me for a while. She gave this to me as she cut it off the loom. I've since tied knots in all the warp (?) threads. I still need to sew the stray weft threads in. The warp have a faint plaid to them as some of the linen thread has yellowed with age, but it should come good as I full it.

Saturday 29 November 2014

Ceramic Project 37 - Dr. Seuss initial documentation

On Saturday I entered the Dr. Seuss plate and bowl into the Fields of Gold Arts and Sciences competition. I made several mistakes with my entry which I knew before I presented them but did it anyway.
Mistake 1 - I spent less than half the time I spent on the project, on the documentation. I was already presenting an A&S class on Indian Garb (cholis) and spent all available time collecting resources for it and writing documentation for Stuarts Bacon entry (which was harder than I thought).
Mistake 2 - I used wikipedia as one of my references. Yes, the teacher in me cringed as I carefully removed the hyperlinks BUT it said everything I needed it to say. I knew I had the information in one of my other books, at home, and I wasn't going to be returning to my house before the event. I considered not adding the quote, however it formed a nice introduction to the extant piece I was working from.
Mistake 3 - Assumed knowledge. I did something I do far too often and assumed that because I entered the competition last year and because I've written the same explanation for my process that a much more cut down version would work.
Mistake 4 - I enclosed a list of places where you can paint and fire your own ceramics without any explanation due to mistake 3. A random list does no one any good.

So, what follows is my documentation before I've fixed it up as well as the commentary I received. I will be posting amended documentation later this week once I've hunted down my sources. I might also put a # next to sections that I'll cut and paste into future documentation.

Tuesday 25 November 2014

Synthetic gemstones

In the past I've spent quite a lot of time cutting stones, mostly opal. I've also made a bunch of jewelery both modern and medieval. I wouldn't call myself a jewellery yet but I do like to dabble. One of the major restrictions I've had is finding acceptable (cheap) substitutes for expensive stones for medieval replicas, i.e emeralds and rubies. I especially want emeralds for Byzantine items.

Making synthetic emeralds out of topaz/rock crystal or gypsum- I HAVE to try thing. First step - buy some beads of each to experiment with.

Research by Dr Marjolinj Bol, Ass. Pro. of Art History, University of Amsterdam.


http://recipes.hypotheses.org/4659


Sunday 23 November 2014

Ceramic Project 37: 1400's Dr Suess set

1400's Apothacary/Pharmacy Jar, Florence, Italy. Met Museum. Accession No 46.85.11

I found the above item while trolling through someones Italian Ceramic board on Pinterest. I fell in love with it. It's obvious I like the dark blue on white in ceramics, and this fish looked so Dr Seuss I just had to make it. I started by making a bowl with the original image because it was smaller and easier to handle while glazing. Originally I was going to have the same design on both items (below) and just change up the rim decoration but the curved sides of the bowl made that too difficult. As a result the bowl is very close to true-to-reference but unfortunately I didn't take a picture before dropping it off at Glazeit.


Thursday 20 November 2014

Some sari/saree terminology

I recently was blipping around Pinterest searching for "Ancient Indian Sari" which as you can expect, doesn't produce anything older than the 18th century. I did see some modern designs as inspiration for my sari project and followed one link to Strands of Silk website. Not only did they have some lovely modern sari's but they also had sections of traditional styles of sari decoration. The following are small segments of their website with links to each piece, each page has a good intruduction then sections on the history, the motifs & colours, production techniques and producer communities. The sort of information that'll be invaluable starting point should I wish to visit these regions myself. I've picked a few forms of decoration, their full list is as follows:
  • Ajark printing
  • Applique
  • Banarasi brocade
  • Batik
  • Block Printing
  • Ikat
  • Kota Doria
  • Mirror Work
  • Patan Patola
  • Pipli Applique
  • Tie and Dye
  • Zardosi Embroidery

The term ‘ajrak’ derived from the Arabic word ‘azrak’ which can mean ‘indigo’ or ‘blue’. This reflects Sindh’s historic reputation as a dominant producer of indigo dye and illustrates the extensive use of the indigo shade of blue in traditional ajrak print, which is still common to this day. Traditionally, ajrak prints were donned by both men and women. To this day men continue to use ajrak printed turbans and cummerbunds, as well as draping the fabric over their shoulders. Just as before, women continue to wear ajrak printed dupattas, chadors and shawls that exquisitely complement other garments such as sarees. The Khatri community, who continue to be dominant ajrak printers in the Kutch district, have recognised contemporary markets, producing traditional ajrak prints on modern pieces such as yardages and home furnishings.
Historically - The art of block printing as a whole flourished in India in the 12th century, and motifs were heavily influenced, in the 17th century, by the reign of Mughal emperors. Ajrak printing, however, historically evolved in parallel as an intricate genre of block printing. Though ajrak printing is synonymous with the Sindh culture of Pakistan, its roots stretch to the Indian states of Gujarat and Rajasthan due to the inhabitants of the ancient Indus Valley Civilisation who, from 3300 BCE, settled along the basins of the Indus River.

Banarasi brocades are one of the finest fabrics that India has to offer. It is a specialty of Varanasi, formerly known as Banaras, from which the fabric derives its name. Throughout history, brocade was a fabric of luxury worn by nobility in various cultures, from India to Korea. Brocade is a heavy fabric similar to jacquard with a raised pattern or floral design. Traditionally the pattern was produced with gold or silver thread said to be of such superb quality that they could be woven into fabric of pure gold and silver. There is evidence of different textured brocades since the Rig Vedic period c. 1750-500 BCE, including fabric of gold known as Hiranya Vastra. Silkora, a mixture of silk and cotton, is a modern textile innovation of Banarasi brocade.
Historically - The textile industry fits into this milieu and brocade weaving with gold and silver thread, zari, has been a Banarasi specialty since the Rig Vedic period between c. 1750-500 BCE. It was during this time that the oldest scriptures of Hinduism, the Vedas, were composed. Banarasi brocades, or kimkhabs, woven with gold and silver thread gained widespread renown during the Mughal period of the 14th century, and with the arrival of Europeans.

The word ‘batik’ is derived from the Indonesian word ambatik, which can be translated to ‘wax writing’. Batik is a 2000 year old art form predominantly practised in Indonesia, Malaysia, Japan and India. Batik is an ancient form of handloom and fabric painting in which the fabric is printed with wax resist before being dyed. Batik was once considered a sign of sophistication and cultivation, owing to its striking yet delicate motifs that include flowers and birds. Batik print encompasses a three dimensional feature with depth and texture.
Historically - Early evidence of batik dating back more than 2000 years has been found across Africa, Central Asia, the Middle East, South East Asia, and the Far East. The theory that the art form of batik evolved independently in each of these regions is plausible. However, historians believe it is also likely that batik spread through caravan trade routes. By the 17th century there were established trade routes between China, the Indonesian islands Java and Sumatra, Persia, which is present-day Iran, and Hindustan, which includes the North Indian Gangetic Plain and the Indus River basin in Pakistan. Batik even travelled as far as the Netherlands, Germany and Switzerland in the 19th century during the Dutch East Indies colonisation. Many historians dispute the true origins of batik. Some attribute it to Egypt, while others believe it originated from India.


THIS heavily embroidered lehenga is my favourite of their outfits I think.


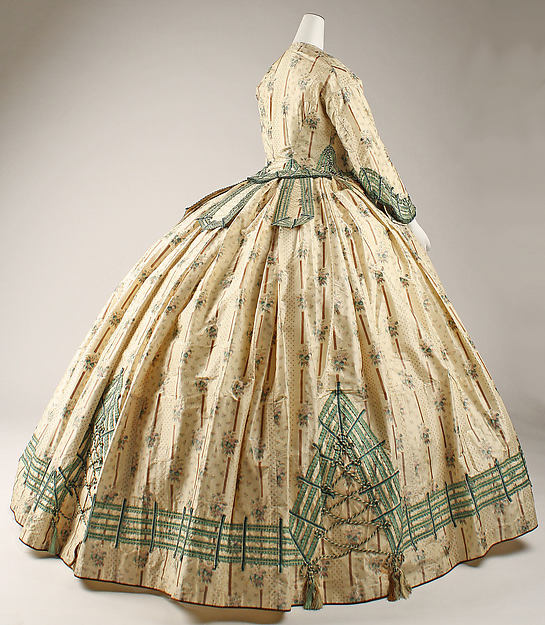
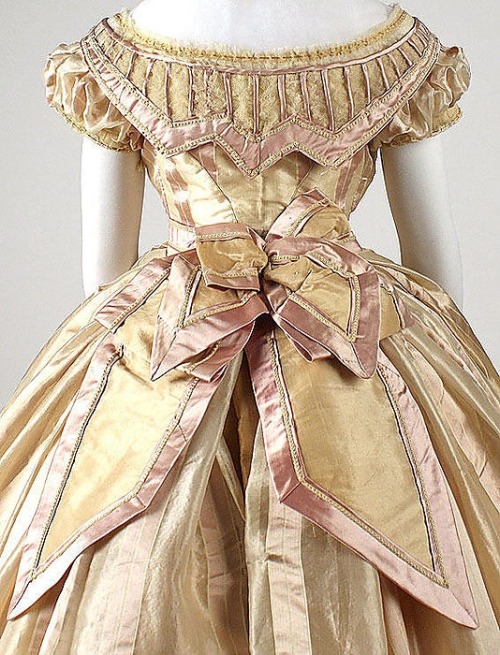
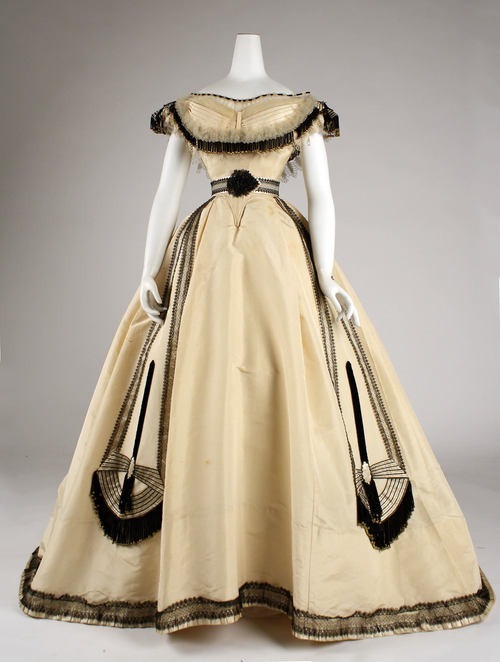
Front, back and the skirt

Monday 17 November 2014

Background research

Researching metal woven stars/crosses with the following key words

woven cross
mandalla woven star
yarn star
yarn cross
gods eyes
sunrays Ojos
Ojos de Dios

Metal, jewellery gods eyes on Etsy / artfire. Standard is pretty low but then wire is more fiddlie than twine / yarn. Minimal attempts at decoration, and no evidence of more than two cross pieces. Perhaps a project for the future. Each image is linked to the Etsy / Artfire store in question. As far as workmanship is concerned, I like the copper one best even if the seller has insisted on adding "amethyst healing stones" - bah!

https://www.etsy.com/au/listing/82640575/gods-eye-sterling-silver-wire-wrapped

https://www.etsy.com/au/listing/117314393/brass-and-copper-wire-ojo-gods-eye-with

https://www.etsy.com/au/listing/175634543/gods-eye-necklace-in-copper-with-healing


https://www.etsy.com/au/listing/103060370/hand-woven-14kt-gold-wire-earrings


And no longer listed on the ebays but this person seems to have made a range of lovely stars (the only one I could find!) under Ojo de Dios metal search term.


Sunday 16 November 2014

Southern Belle dress diary - part 6


Final steps:

Friday, and I flew up to Brisbane around lunchtime. This meant leaving the house at 8am in order to trek to the airport in time to ensure I got my flight. Since 9/11 airport security has theoretically been more stringent, but I managed to get my sewing kit (sans scissors) on board so I was able to work on small bits during the two hour flight.


I had thoughtfully prepared for the flight by sewing up some strips of the blue silk stuff. I didn't really have any clear concept about what I wanted to achieve with them so I bundled them, some pearls and some lace into my handbag and figured I'll work it out on the flight. Work it out I did! I decided to make some rosettes which I could then use to embellish the dress. (Go here for a quick and dirty how to). The rosettes were the last things added to the dress. Originally they were going to be placed along the blue trim helping distract from any potential lumpiness. The problem with this was that I'd have to put on the corset and the dress in order to get the placement of the 8 rosettes right. I really didn't want them on the peaks of my breasts because they stick out enough already thanks to the corset. Given they were sewed on around 1am on Saturday morning, I placed them at the base of the strips and at strategic places along the waistline. I didn't get time to make the sash I wanted so these rosettes helped tie the dark ruffle to the trim along the bodice.

On the subject of trim, this was started on Friday evening while sitting around with Tamar and Sophie. I started by carefully sewing along one edge of the trim so it sat flush with the lace. About halfway along Sophie pointed out that if I used a running stitch down the center and embellished it with pearls it'd hold the trim down, look great AND save me a bunch of time. She's so smart! So I did as she suggested and I'm quite happy with the result.


I added pearls in the center of the rosettes as well to give them more depth. The blue trim ran next to the piping which terminated in the upper sleeve zone. I decided to run the lace and the trim along the top edge of the sleeve as I wouldn't get time to sew a sleeve on and I needed to clean up the edge. Rather than running the trim down the back of the dress I decided to terminate it at the shoulder blade where the back piping started. I gathered the spare trim in and created rosettes around the final pearl. It gives it a little extra something and ties to the rosette at the bottom of the piping. As a last minute idea I'm really quite pleased with how it turned out!


To complete the outfit I wore my elbow length cream gloves, a pearl necklace and pearl earrings. I used ideas from this youtube Southern Belle hair style tutorial and put my curled up hair through a doughnut which I then covered with the strands. I then wrapped two side plaits around the bun and tied the curls off on one side with leftover blue trim. I used one of the leftover rosettes to pin a random curl on the other side and borrowed a pearl pin from Tamar to hold it down. Below is a picture taken by Leisel of Tamar and I. Tamar is also wearing a corset under her lovely card-dealers outfit.


Once I got to the party, someone mentioned there actually was a date on the newsletter we were sent - Octber 20, 1874. Well, I missed the dress date by about 15 years and the whole bell shape -> bustle thing as well. I did get the biggest compliment from Carolyn though. I've always admired her SCA garb and I know she does Victorian costuming as well. She had posted an image of her petticoat while I was wrestling with the tulle, and it was lovely! She said I looked like I was wearing my great grandmothers dress and she even knew it was 1860's! In my head - "NAILED IT!".


Things I might still do:
Remove rosettes and reposition
Make tie shaped sash
Lace along ruffle to stop it being such a solid block of colour (it's sort of lost in the gloom at my feet)
Sleeves, possibly puffed, possibly with lace or pearl trim.


Thursday 13 November 2014

Southern Belle dress diary - part 5

Today was epic! Mostly because my deadline is fast approaching and I fly out to Brisbane on Friday. As a result I pretty much spent all of today on this dress (including staying up all night) and this is going to be quite a long post.

Day dress, 1862, Met Museum - I LOVE the cutouts on the sides

I started by spending a couple of hours pinning and repinning the skirt to determine the appropriate drape. I've now collected a pretty good pinterest collection of reference images. Originally I wanted the bodice and the skirt to be separate pieces like in the image above. Then I realised that the bodice wouldn't sit right without the skirt. The weight of the skirt holds the bodice in place so it doesn't float against the silk corset when I raise my arms. So I decided to attach the skirt to the bodice. I then wanted to retain the point of the bodice as I could fasten it at the waist and let it flare naturally into two points over the bustle. I've found a number of lovely decorative approaches to bustles over the last few days - it's so great having this many extant pieces to choose from!

Back detail of cream and blush silk dress - Met Museum, 1865

After playing around with the drape of the skirt I realised I'd have to add a twill tape for the skirt to attach to under the bodice from both sides that'd have to close somehow under the zip/button combination. At that point in the afternoon it went into the too hard basket and after my mother helped me pin and bring in the sides of the bodice I attached the skirt directly to the bodice all around. The V's ended up on my hips.

 Emile Pingat ball gown. Met Museum 1860 - I love the black sash detail!

This blue silk dress sold for $444 on ebay in 2012. The seller claims it's 1850-1860's and was donated to some museum and has the accession number: 47.168-2. I just love the stripes and the sash details.

I had draped many different styles, from the smooth bell shape, to one smooth at the front and pleated at the back, to something more gathered. In the end I fell in love with the style above because it just worked with the fabric I had. Below is an image of the skirt tacked to the bodice and experiments with lace in progress.


Once the skirt decisions were made and the bodice and skirt tacked together (with red thread no less!), I had to make some trim decisions as they may or may not need to be sewn in with the skirt and bodice. If you recall earlier in the dress diary I had pinned a blue silk front to the dress in an attempt to hide the pesky lacing loops. While looking for dress designs I had an impossible time trying to document a contrasting panel in the center of the bodice. The closest I got was the image below and I'm pretty sure that's a top wrapped over the dress. Also, due to the wonders of pinterest, I'm really not sure when that image was taken. To my untrained eye it could be 1860, but as I have no other evidence for such a thing I had to abandon the idea.


So without documentation for a full panel I had to document some sort of seam treatment or ribbons or something that'd cover the area in question. So I turned to the trusty internets and found the image below and fell in love with it. I could pretend that it's the justification for the blue-ish silk but I made that decision based on how much fabric I had and the colour rather than any extant dress. So I can use strips of silk to cover the lacing loops.

1865 day dress fringed in teal taffeta trim. Dress has a belt with a large peplum (bustle sort of bow decoration). Whitaker Auctions.


In addition to the silk bodice decoration, I really liked the tie shaped sashes on the Emile Pignat dress (and a few others). So I tried draping it with some spare fabric. The idea is to use the brocade for a majority of the sash and edge it in the blue silk. As the sash is detachable this has been put on the back burner until the dress is completed. The next challange - accomodating the hand length of space now on the base of the skirt.


Due to the move from hip to waist and the lift provided by the tulle petticoat and the hoop skirt the hem of the dress has risen about a hand's length. I've measured the base of the skirt at 6m (the waist measurement pre-gathering is 4m). For fabric I have two choices. I have two, 2m pieces of brocade or 12m of very light (artificial?) silk stuff. I could just extend the hem however I can't document same colour, non-ruffled trim (counter-colour is a thing though). I can, however, document a trim at the base of the skirt in a dark contrasting colour (below) AND tie shaped sash things edged with the same colour.

So I experimented. On the left - wide gathered blue trim with upper ruffle and lace, centre - thin gathered blue trim on smooth brocade with small blue ruffle and lace at join and finally - smooth brocade extension panel. I decided to go with a wide blue silk trim and gathered 12 meters to my six. This took me most of the wee hours of the morning as I was so tired I kept screwing up the gathering ratios. My usual method for gathering is to determine the ends of the panel and pin them. Then I pin the middle of the gather and the middle of the panel together. I then sort of squish or expand the gather until it fits. I pin the hell out of it and then sew it down smoothing the gathering as I go. I was rather happy that I didn't do my usual trick of accidentally sewing the base of the trim into the top of the trim. As this took so long I didn't end up attaching the lace - this will be a dress near completion step.


Silk dress, 1864, Met Museum - Very short sleeves with darling lace, simple ruffled trim on skirt and flat waist. I'd feel beautiful wearing thins.


Finally I looked at the possibility of adding ruffles to the neckline as can be seen below. The idea was to make something like the silk dress above and use the ruffles to create the illusion of a broader neckline without having to alter it. Given how high the next was at the bottom and my rather generous chest I decided that adding additional bulk in that region probably wasn't a good idea. Once that decision was made I felt I could sew the bodice, trim and skirt together and complete the final touches on the plane and at Tamar's place.


Things still to do:
Hand sew in front panel
Sleeves
Decoration
Belt / sash and peplum

Wednesday 12 November 2014

Southern Belle dress diary - part 4

Today I unpicked the entire dress. I've removed the sleeves and separated the skirt, the panniers and petticoat from the bodice. I spent pretty much all day washing the fabric (everything except the tulle). I've also ironed it to try and get most of the creases out. It took forever because I did both the front and the reverse hoping to get it smooth. It's almost there, I'm probably not going to take it further because it'll just collect more when it gets crammed into my baggage so I'll wait until I'm in Queensland until I iron it completly. I've also ironed the 12 meters of blue (artificial?) silk sari that I'll be using for contrasting trim. So much silk-stuff!

The brocade after ironing (left) and before ironing (right) - this is why I went over it two times!


Things done:

Adjust the hoop skirt -
I cut off the waistband of the skirt by cutting off the skirt 8 inches above the top hoop and adding a new waistband made out of random white fabric. As the skirt was originally A-line I needed to gather the fabric in a little. I sewed a straight band to a majority of the skirt and gathered the remainder in the last section before the tie. This pulls against the hoops unevenly, resulting in the hoop sitting closer to the legs and puffing out in the back like so:


Tulle skirt gathered to true waist -
This was a little challenging as both tulle layers had been attached to the bottom of the bodice, as a result it had V shaped dips in the waistband. I started by straight sewing a new 120cm long waistband to the tulle. Given the difference in measurements between my hips and waist and the extra distance added by the V shapes I ended up with a significant overlap. Happily, I could position the frontal V at my front and the two extra 'puff' sections of tulle that used to be for the panniers wrapped around and overlapped at the back giving me better bustle.


I started by over lapping the two sections over each other and attaching three hook and eyes to the side of the waistband. Though this gives me the best bustle, as you can see it's pulling oddly. I tried to fix this by extending the opening all the way down to the ruffled tulle layer but the overlap proved to be too much and was lopsided no matter how I fiddled with it. The bit that under-lapped wouldn't sit flat and kept pulling towards the side with the clips.


In the end I angled the waistband and used three hook and eyes. The extra lengths on each side folded in under the waistband and overlapped themselves like this  ><. The fluff of the bustle wasn't as amazing but it sat right so I went with it.


On a side note - I really don't like tulle, it's so easy to catch your scissors on it and tear it.


Things to do:
Work out right drape for fabric
Determine how to extend bodice with brocade
Placement of blue accents and ruffles
Hand sew in front panel
Sleeves
Neckline

Tuesday 11 November 2014

Southern Belle dress diary - part 3

Always start a dress from the bottom up, especially if your dress needs supporting garments.

So from the skin up:
Chemise - Check
Drawers (or for me, petticote and modern underwear) - Check
Corset - Check
It's rather challenging lacing yourself into one of these.
I can get my waist to a smooth 70cm without being too uncomfortable.

Crinoline - errr?

I've been pondering using my gold silk corset as it was custom made to my measurements so I know I'll be able to wear it comfortably for hours. The crinoline is also from my costume collection. It's come in handy over the years but for this costume it's simply the wrong shape - it's more 1880's (see below). If I hoike it up so the bottom hoop is around knee high, I'll get more a 1848 silhouette. I really want the 1860, but I don't think I have enough time, fabric or hoop wire to make it.

Image from The Pragmatic Costumer who's blog has some great American Civil War stuff! 


The solution: reuse the petticote stuff from the Marie Antoinette dress (gold skirt draped to provide clear indication of shape). The petticote consists of a liner and a knee length skirt with gathered tulle, an tulle overskirt and four bunches of extra tulle, two on each hip. As I'm shifting the waist of this dress from the hips to the true waist, I've got alot of room to take this in. To get the above silhouette I gathered it in such a way that the sides overlapped at the back resulting in two of those tulle bunches in the bustle zone. I'm rather happy with the resulting shape. It's not the giant bell seen in many of the southern ball gowns but I'm not exactly attending a ball am I?

For extra puff I can add this wrap skirt which I completely forgot I had. It's black so may have to go under the mess of tulle. I'll make that call later though.

Things to do next:
Hoike hoops & make new waist band
Gather tulle and work out closure system
Determine if black skirt needs to be integrated (can the hoops stand the strain?)

Monday 10 November 2014

Southern Belle dress diary - Part 2

Here is the link to my Pinterest collection of Southern Belle dress inspiration so far.

I have no idea who this lady is, but I love the effective use of colour - delightful!


Today I unpicked the sleeves, the pannier pannels and the main skirt. I'm going to leave the attached petticoat because it's designed to sit lower than the waist of the adapted dress and changing it will mean the bottom hem won't sit right anymore. I don't think this will mess with the fall of the completed skirts.

The unpicking yielded 3.5 meters of plain silk satin and a little over two meters (in two sections) of brocade.

I've decided that this dress is going to be constructed of 1.5 layers. The lining of the current dress will support the petticoats and the finished skirts should slip under the rest of the bodice so it ends up with the right sort of line

I've also been playing around with adding a coloured silk panel to the front to hide the lacing loops, and perhaps some flounces or detailing in the same blue/green shot silk. I've also rustled up some cream lace (both handmade and machine embroidered) and am experimenting with placement.


Lace pointing out (and hiding the piping?) or....

Lace facing in revealing the piping. Lace in helps smooth the bumps left by the lacing loops, but lace facing out appeals to me more.
Hip ruffle - Idea discarded! A ruffle following the waistline of the old dress would work however the new dress has a much higher waistline. The skirt will flare sharply from this waistline to create the bell-skirt. A smaller ruffle at the waist will potentially look silly as it'll be horizontal rather than laying flat.


Sunday 9 November 2014

Southern Belle dress diary - Part 1

How to make a Southern Belle dress?

Some people visiting this dress diary may have googled "how to sew a Southern Belle Dress" as I did. There are surprisingly few 'how to' guides and I took me at least half an hour to work out why! Let me rewind and start from the start:

I've been invited to a themed birthday party, Wild West, and my character is a western girl pretending to be a Southern Lady. So... I'm from Australia. Melbourne specifically. "Southern Belle" is not at all part of our culture. So I googled it, and googled it and pinterest-ed it and realised what they mean is (American) Civil War (or thereabouts). There are many Civil War patterns available however I currently live a good hour from the nearest fabric store and as semester is over, I'm currently unemployed. So I need to use my patterning skills (limited), my preexisting costumes (some) and my fabric stash (lots) and create something appropriate.

I have two other requirements; it needs to be able to pack down so I can fly with it, and it needs to be cool-ish so I can wear it in muggy Brisbane. I think I'm going to fail on the second one and the first one will be tight so here goes:


This is the base dress I'll be using. It's someones old wedding dress that my sister bought for me from the op shop (American: Thrift Store) for $75. It was probably once whiteish but now it's a nice creamy-ivory colour. I've picked it because it has an excessive amount of fabric in the skirts which are plain heavy satin and a brocade and I doubt I'll be dressing up as Marie Antoinette again.


To make it into a more civil warsy look I need to modify a number of things - waist line needs to be moved to true waist, sides need to be brought in so it works with my corset and I might need to lower the neckline.

One of the problems of using a second hand dress is the make-up stains that came with it. They weren't such a problem for zombie Marie-Antoinette but will be for a clean cut Southern Belle. This stain in particular has ensured the arms will go.

Monday 3 November 2014

Persona Research - names


So I've been part of the SCA since, um, 2003? In 2009 I stayed with William and Kim while visiting  my co-supervisor in Brisbane and William prevailed upon me to register my heraldry and name. In fact, it was the requirement of his wonderful family hosting me for the week. I knew what I wanted as my heraldry but had no idea about my name. I settled on Travaillie because it sounded like traveler (sort of) and meant something like trouble in French matched the region of my first name which I could then retain. As I'd already spent far too much time without a persona name, I'm sort of got stuck with Ant.

For the last couple of years I've been researching Indian personas and garb and wear Indian to almost every event (weather and fighting permitting) so I've decided I'm going to register an Indian name and device for my eventing persona and retire Antoinette to the back corner with the ceramics.

I want to incorporate 'Ant' because that's what most people call me these days and the lovely Margavati posted a link to a digital translation of The Rajatarangini. Originally written in Sanskrit in 1200 in the Kashmir region, it's recently been translated into English and can be found here. Rather than read the whole thing (577 pages) this weekend I auto-searched for 'ant' and scrolled through tons of "antiquities" and "wants" to find:

60 - "To appreciate Kalhava's merit in this respect it is enough to corn are the pictures he glves us of
personages like Tuiga, Ananta, Harsa, Sussala,"

67 - "Equally impressive is thediscription of Ananta's funeral and the Sati of his consort Sfiryamati" (page 67) - Bugger Ananta is male. (Ananta1s reign (AD. 1028-1063))
123 "the capital of a district of Bellgal, he attracted by deed of great prowess the attention of its king, Jayanta"
124  " Etatnilrara is distinctly mentioned by the poets who obtained fame in the reign of Avantivarman (A,D. 1355-883),"
130 - "Unmattavanti (the mad Avanti ), another son of Piirth~,w ho mas next raised to the throne, appears to have done his best to justify his name."
?? -  "Seventeen ladies of the royal household, among them the chief queen Vasantalelrhs who was a princess of the S'ihi"
117 - "He lived under King Anantadew (10'141064 A.D.) and his son Kasala (1088 A.D.)."
361 - "When one of the Brahmans, instelld of saying, "Well done, 0 king," in his joy spoke unceremoniously, [' Well done, 0 Avantin," he received [from the king] many handfuls."
430 - "Eamantaka, who, in spite of this, had yet for a short time struggled on in the fight, fell from his horse with his sword broken, and was caught alive."
438 - "Also Sumaltomantalra and the other Brahmans, who had taken the gold[of Diddij, were all caught and put into prison by Tunga."
454 - "With praiseworthy brbvery, Anantadeva attacked in person Tribhuvana in the fight, warding off his unerring darts with his sword."
516 - "Vasantalekhri, the king's wife, who belonged t,o the S'ahi family founded Mathas and Agrahkas in the City and at the holy Tripureivara.


And that's it, in 577 pages, two female names containing "ant" and I'm fond of neither.