Showing posts with label Jewellery. Show all posts

Monday, 22 February 2016

Tidy ideas - how to sort your SCA jewellery

After moving house  I wanted to set up my spare room to hold all of my garb and accessories. I've repurposed the Ikea shelves project from last year and now it holds my garb, shoes, saris and sari accessories. I also wanted to hang all my jewellery and hats out to prompt me to actually wear some of it. I stole this idea from Duchess Constanzia who has all of her hats, hair accessories and jewellery on display to make mixing and matching easier. I'm not at that level yet because I dabble in too many cultures and don't really have sufficient breadth to my wardobe to mix and match (yet).

For this project you will need:
1x Ikea cork board (The bigger the better)
1x pack of push pins
1x pack of paper clips

Not-so-pro tip: The board comes with pushpins but not enough. You can buy the push pins and paper clips from Target quite cheaply as a school kit.

Step 1: Assemble cork board
Step 2: Hang cork board
Step 3: Push in pins, use a row along the bottom for necklaces
Step 4: Bend paper clips into hooks for items that can't be pinned (brooches etc)

I've clustered event tokens on strings on the bottom left and Pennsic / Rowany event tokens along the top. I may actually put them into a storage box and I'll never wear them again and as I make or acquire more items I'm going to need that space.

Tuesday, 25 November 2014

Synthetic gemstones

In the past I've spent quite a lot of time cutting stones, mostly opal. I've also made a bunch of jewelery both modern and medieval. I wouldn't call myself a jewellery yet but I do like to dabble. One of the major restrictions I've had is finding acceptable (cheap) substitutes for expensive stones for medieval replicas, i.e emeralds and rubies. I especially want emeralds for Byzantine items.

Making synthetic emeralds out of topaz/rock crystal or gypsum- I HAVE to try thing. First step - buy some beads of each to experiment with.

Research by Dr Marjolinj Bol, Ass. Pro. of Art History, University of Amsterdam.


http://recipes.hypotheses.org/4659


Monday, 17 November 2014

Background research

Researching metal woven stars/crosses with the following key words

woven cross
mandalla woven star
yarn star
yarn cross
gods eyes
sunrays Ojos
Ojos de Dios

Metal, jewellery gods eyes on Etsy / artfire. Standard is pretty low but then wire is more fiddlie than twine / yarn. Minimal attempts at decoration, and no evidence of more than two cross pieces. Perhaps a project for the future. Each image is linked to the Etsy / Artfire store in question. As far as workmanship is concerned, I like the copper one best even if the seller has insisted on adding "amethyst healing stones" - bah!

https://www.etsy.com/au/listing/82640575/gods-eye-sterling-silver-wire-wrapped

https://www.etsy.com/au/listing/117314393/brass-and-copper-wire-ojo-gods-eye-with

https://www.etsy.com/au/listing/175634543/gods-eye-necklace-in-copper-with-healing


https://www.etsy.com/au/listing/103060370/hand-woven-14kt-gold-wire-earrings


And no longer listed on the ebays but this person seems to have made a range of lovely stars (the only one I could find!) under Ojo de Dios metal search term.


Tuesday, 24 December 2013

On earrings

Jain art - Celestial performer Kapasutra manuscript folio Gujarat 1490


I found an interesting blog that has some musing on late period Indian garb. I'm not sure when I found this blog. I'm pretty sure I got there through a tab explosion one night while researching choli patterns. Due to my bust exceeding my rib cage by a significant value, I am on a never ending quest to find a period choli that a) I can sew and pattern myself, and b) supports my bust, or at least doesn't look saggy/sack like. But I digress, the blog in question is written by a Laurel type from Meridies (I think) who appears to be into cooking, and late period Indian (16th century, heavy persian influence).

While browsing her back catalog of posts, I found one on late period earrings. Her main focus was the revelation regarding the pointy ones you see in the upper ear. (read it here). During her discussion, and within a different post about garbing for a feast she ran, she references hoop earrings. She also has a post about some lovely hoop laurel earrings she made out of femo and beetle wings. She offers two explanations for the shape; first they may be stretching hoops, or second they may be loops that depend from the ear. She seems to favour the second type.

I have been researching jewellery myself and I would suggest the earrings in question are stretching hoops. In the images below (yes, I've posted it before) you can see both wealthy women and nuns. The nuns, who have limited worldly goods, have earlobes that are clearly stretched and dangle loosely without the bulk of the earring seen in the women in the right.


Detail from a folio from a Kalpasutra Manuscript. Gujarat, 1350. Ink and opaque watercolor on palm leaf. Page 86 in Indian Painting, 1000-1700, by Pratapaditya Pal. ISBN: 0810834655 

The stretched earlobes could be explained by the weight of gold loops exerting pressure on the skin over time (recall seeing overly stretched and grotesque old 'lady' ears?) however the ascetics don't appear to be that old. In the next image from the Ajanta caves, you can clearly see the earlobe stretched around the hoop on the lady on the left.


Also, this group of statues from Khajuraho shows a beautiful lady wearing disks served by an attendant whos ears droop.


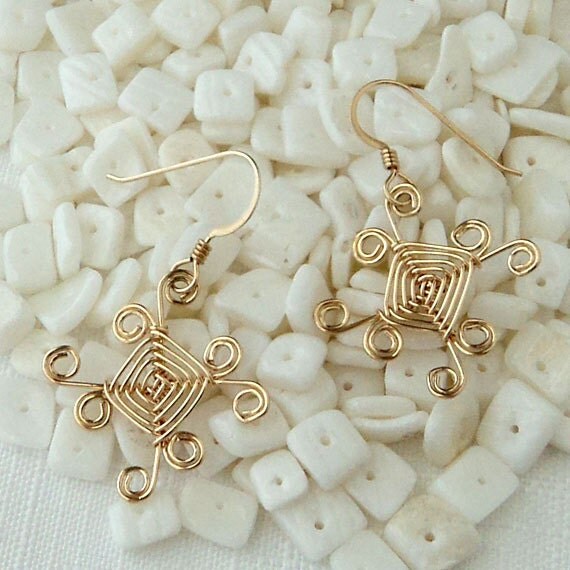
I do not plan on stretching my earlobes anytime in the near future, so I will stick to the more dangle type of earring such as those below.

 Earrings Object ID: B86M6.1-.2 300-500 Gold and Garnets These earrings came from Gandhara, the ancient kingdom located in what is now southern Afghanistan and northern Pakistan. A famous school of Buddhist art flourished there from the 1st to the 4th century A.D., characterized by sculptures carved in a mixture of Graeco-Roman and Indian styles. Although Gandharan sculptures are included in most museums' collections, jewelry from Gandhara is rare. Asian Art Museum of San Francisco

Friday, 9 August 2013

Pennsic teasurers pt 1 - Byzantine stuff

I just got back from my Pennsic pilgrimage and I managed to collect all sorts of treasures this year (yes, I went a little over budget). I got some delightful sari's from pennsic from Flori of Northshield. Some nice, possibly not very period, Persian garb and some random trinkets. The sari's have inspired me to find out more and attempt to document my newest acquisitions.

 First up: a birthday necklace that Dash bought for me (not pennsic treasure, but very close). It's been many years since I've received jewellery for my birthday. Dash commissioned the necklace from an Etsy seller as a replica of one in the Walters Museum. It's been created from recovered pieces from other necklaces. She's done a pretty good job and it's even in my heraldic colours!

 My new necklace: pearls, blue cats eye beads, red glass beads and silver doohickies.


The original Byzantine necklace from the Walters Art Museum. gold, malachite, sapphire and semiprecious stone. Item number: 57.54. From Egypt. 


On the long trip home, I happened to traispe past the Met Museum of Art retail shop and I couldn't help being drawn in. It was hard not to buy most of the store. I ended up going home with some Byzantine paisley pendant earrings. They are lovely!


Tuesday, 18 December 2012

Kumihimo - a start

Last month I attended the Melbourne Bead show. I'm not really a fan of bead crafts, partly because I find it far to fiddley, and partly due to some of the hideous beaded 'fashion' items I've encountered over the years. Mostly I went to spend far too much money on seed pearls. I succeeded!

On my way out, I spotted a beautiful seed pearl necklace. It really caught my imagination as I suspect it was suposed to. Rather than buy it, I thought that I could just learn how to do it myself.

It looked something like this - simple yet lovely.

So, I went to the only store selling kumahimo kits and failed to buy the last one... yep, that's right. I stopped to browse some art glass beads on the way and when I arrived, someone had just bought the last one! -mutter-. So I ordered one and it arrived in the post a couple of weeks ago.  My kumahimo projects to date:

Created with 4 lengths of blue (3x strand cotton) and 4 lengths of red (3x strand cotton) embroidery thread. I bound off the ends in a loop with excess blue thread and attached both sides to a post. The blue beads dangle from a loop, thus the pendant is interchangeable. I suspect a single strand of a stronger cotton thread would work better (available in the wool section at Spotlight).

I may post instructions on how to do this simple twist pattern at a later point. I've been finding kumihimo is quite relaxing for watching the tv with and it's rather nice seeing the cord emerge as you twist.

Wednesday, 5 December 2012

Necklaces

I went to the Melbourne Bead Show a couple of weekends ago and spent far too much on garnet beads and pearls. Once I got home with my new treasurers I was inspired to make myself some new necklaces. I really wanted to string some pearls to go with my Cranach choker but I found I didn't quite have enough of the right size to make a string as long as I wanted. So I compromised and made some necklaces I'm quite happy with.

I had already strung a garnet and pearl necklace, and a sodalite and pearl necklace a couple of years ago (two on left). I quite liked these because I used small pearl spacers between the garnets and sodalite. I made these before I knew that knotting the string between the pearls stopped them rubbing together and breaking. Since I was out of pearl spacers I decided to make some similar necklaces I could wear as bracelets if I wanted. I used a three garnets, one pearl pattern and tied the string between each stone. I also used a goldish magnetic clasp that I had lying around. This turned out to be a mistake as I now cannot wear any other metallic necklace or earrings with this, as the clasp tries to attach to everything!

The new necklace (front) and the old necklace (back)

Next up was the sodalite necklace. I've used the last of my sodalite stock making a silver hairclip (it jingles nicely) so I substituted what I think might be apatite. The blue is slightly darker but still looks nice. As I didn't have much apatite, I went with three pearls and one apatite bead pattern. I re-used an old cylinder screw clasp as I didn't want to have another necklace that wants to bond to everything!

The new necklace (front) and old necklace (back)

I also have a small stockpile of stone beads that I bought online on a whim many years ago. I got some (probably man-made) chrysocolla type beads from a craft shop last time I visited America and I thought they'd be perfect for a leaf shaped (agate?) pendant bead. I'm really happy with how this one turned out. I can't stop stroking the agate when I wear it as the finish is so very smooth.

Chrysocolla, pearl and agate necklace.

The final necklace I made was actually inspired by a medieval portrait of a Woman by Lorenzo Costa (1460-1535). The original necklace appears to be made of pearls (or tapered gold cylinders) and onyx (or silver beads). It joins just before her neckline and splits off into two sections. This could end as a beaded tassel but I prefer to interpret it as a loop. Mostly because that makes stringing my beads MUCH easier.

Detail of a Portrait of a Woman by Lorenzo Costa.


My necklace is made of onyx and light pink pearls. It has two central focal beads, both onyx, and a simple hook and loop goldish clasp. Though I'm pleased with how this turned out, the lower focal bead is a little too large and it's weight pulls the loop into more of an oval than the circle I wanted. The angles suite the portrait though.

Thursday, 20 September 2012

Cranach neckpiece finished

(above) testing design elements, I rather liked the purple flower but it's too modern.

I've been playing with ideas for a begemmed choker a-la Cranach for a while now. I've debated making one out of femo so I can get the detail right but it'll be almost impossible to make it fit properly. I ended up using a wine-purple velvet ribbon as my backing. I then sewed brass plated accents which I've been acquiring from Spotlight for some time now. I further decorated with some pale pink pearls. The choker will eventually have a clip at the back joining the two tear drop shapes. I quite like how this has turned out even though it's not entirely like the Cranach ones.

(below) the finished choker. The gold-ish accents are flimsy enough to bend to the curve of my neck.


Thursday, 6 September 2012

The Viking World - Review


 (above) A swedish pendant featuring a viking woman wearing a trailing dress and shawl. Beads hang from what is probably a brooch on each shoulder. Her hair is knotted behind her head. (page 114)


The Viking World by James Graham-Campbell, the 1980 version.

This book contains alot of good reference images, both photographs of artifacts and line drawings of the same. There are some schematic drawings of villages and women at work at bring all the information together in one image. A variety of topics are covered, from boat building to hoards and jewellery making. A large variety of primary sources are presented in this book. Well worth the read even if some of the conclusions are no longer up to date.

(above) Impressed gold foil from Norway of a couple embracing. The female on the right wears a long cloak. The males cloak appears to be held in a brooch over his right shoulder leaving his sword arm free. Page 114.  (below) 10th Century equal armed brooch from Birka. Page 116.


Strings of beads from Birka. page 118  Inner string of beads are made of imported crystal and carnelian.

4.5/5

Thursday, 23 August 2012

Masterpeices of Ancient Jewellery - Review


Masterpieces contains some lovely images of ancient jewellery. Some pieces are drawn from private collections so aren't usually available for study. The photographs in are detailed and highlight the glorious items featured in this book, from statues and stands, to earrings and pins.

The book is divided into sections concerning Mesopotamia, The Levant, Persia, Byzantium and Islam. Each section is prefaced with an interview of a leading archeologist in this specialty. The questions asked of the archeologists are very general such as "Tell us about the gods, the priests and the temples". I feel there isn't enough specific information provided in the text for this book to be labeled as a reference book. The text is formatted with x3 spacing, making it difficult to read and there is, at maximum, three objects per page and a lot of white space. For a book of 144 pages it contains surprisingly little information.

I consider Masterpieces more of a coffee table book than a resource.

3/5
 

Monday, 6 August 2012

Jar of Strawberries

Sharing more Femo fun! Jar is 3cm tall. Once I've filled it I'll lash the neck and turn it into a pendant.

My sister has used a similar bottle and created brain in a bottle! She constructed the brain out of Femo (massivly impressed by the detail she managed), she used sunflower oil instead of formaldehyde, she sealed the cork with PVA and we glued it in with Tarzans grip.


Saturday, 4 August 2012

Femo strawberry pendant


I got this idea from PiTop who provides a nice simple construction tutorial.

Having made a couple now (because you can't go wrong with strawberry jewellery) I've got some extra hints and tips.

1. If you are using non-brand name ploymer clay and it tends to be a little crumbly (the red based colours tend to do this) mix it with a little of the white or some white Femo to make it softer and easier to handle. Use a variety of products to get a consistency you like.

2. If you don't have the metallic iron on studs suggested by PiTop, press holes into your strawberry and use a fine brush and your gold acrylic paint. I used JoSonja's Rich Gold paint. I love JoSonja's as it's a good medium price range paint widely available throughout Victoria.

3. You can insert the eyescrews before baking however the Femo is soft enough that you can use a 1mm drillbit and screw the eyescrew in after cooking. I bought 1mm and 1.2mm eyescrews in gold and silver tone from the screw isle (painting / hanging screws) in Bunnings.

4. Getting finger prints and fine tool marks in your femo? Use a slightly wettened finger to smooth out the marks. You can also sand femo after it's baked to remove any marks.

5. Clay tools are wonderful if you can get them, but if you're making miniature objects, most tools can be made from wire or plastic lying around the house.

6. I baked my Femo at 180 degrees Celsius for ten minutes. I've also accidentally left a project in for 25 minutes at 180, it didn't seem to affect it. There are alot of advice on how to bake your Femo. I've found this site lists temperatures for a range of products.

7. My most awesome sister bakes her Femo on a tray of aluminium foil which is then enclosed in foil. A great idea to reduce potentially toxic fumes (jury is out on this) AND an excellent idea to avoid contaminating your oven / artwork - especially if you live in a share house where who knows what has been cooked in that oven!

I love crafting randomness!