Saturday, 17 November 2018

Tyrant productions Part 1

The start of my year was very much caught up in preparations for Rowany Festival. If you are familiar with my projects, you'll know I've been the RF cartographer for 6 (?) years. Ever since I created the job really. It involves a lot of fiddling around with maps and doing my best to please over 800 stakeholders. This year, I was also making garb for Tyr. He needed enough garb for a 6 day event and he's not the sort to schlep around in a basic t-tunic. Oh no. Unfortunately, the only items he had were a couple of shirts I'd acquired at Pennsic and a vest he brought along.

As the shirts were late-period-ish, we had to settle on a wardrobe collection that'd please his sense of flair and wouldn't be too challenging for my sewing skills. We eventually settled on Landsknect, partly because I've been collecting images for hat making, and partly because it has so many options.

I'm not going to go into everything we made, but by the end he had 4 pairs of pants, multiple shirts and a vest. As I've never made fitted pants before, it was quite a learning curve. Tyr also helped out by fray-stopping all the slashed edges. He also sewed some codpieces.

Tyr accidentally in the background... photo by Rachel Vess

I suspect Tyr is really proud of this codpiece. He designed and made it himself. As one of two token American's he didn't really need to advertise but it garnered no end of appreciative smiles. Unfortunately, it was washed in warm water and the red ran so the codpiece is no more.

Friday, 16 November 2018

St Florian hats

St Florian Hat 1 at Rowany Festival. Photo by Rache Vess.

Late last year I made some hats for the upcoming B&B of St Florian. The hats needed to be appropriate to their German garb and tie into the St Florian device which is a purple buttony cross on a white background.

For these hats I used a heavy black wool which was a little too stiff for a coat. Their expect-ellencies supplied me with some purple and white satin material which they were going to use on other aspects of the garb as well. I used halloween witches hats to provide rigidity to the brim.

This project suffers from the same problem my cranach hat did, where black wool is very hard to photograph well so instructions but no step by step photos are below the cut.

How to dino

a) Triceratops trial.

I thought I'd share my process for the geometric dinosaurs I've been playing with this last year. It's quite straightforward if you follow some basic rules:


  1. No curves
  2. No partial terminations.
  3. Triangles must orientate with the direction of texture flow
More ideas below the cut

Thursday, 15 November 2018

Heraldic cups - blowme of Saint Cloud

My new heraldic device is azure (blue), mistral contourney over an  mountain agent (white). I've been playing with the motifs because it's about time I made myself a ceramic cup. My finished ceramics are piling up and waiting for a trip to Victoria to be fired. I really need to complete my bisque stockpile and find a way of indulging in my hobby without the need to fly to Victoria! I took a few liberties with the design and I really hope this improves with firing.

Front, unfired. Back, unfired.

Geometric dinosaur tri-al

I've been neck deep in block printing experiments this last 9 months so please tolerate the upcoming flood of enthusiastic posts.

Spotlight has now started stocking speedball ink and a variety of supplies and ArtRiot had a buy $40, get $40 sale so I now have a goodly stockpile of various things to experiment with. First up is the Speedball Screen Printing Ink. This is sold in a four pack of black, red, blue and yellow at Spotlight for reasonable prices. I also bought white because I like the idea of white block printing then overdying with indigo sometime in the near future.


To test the ink I hand painted another geometric dinosaur. The paint is designed to be pushed through a screen print frame. As a result, it's quite sticky and will need thinning before being used in block printing.

If at first you don't succeed, tri, tri again.

The tricerotops on the left was painted with a flat bruch while the one on the right used a tapered round. The paint was easier to load on the tapered round and i didn't need to go over the lines as much. As a result, the lines are less fluffy. I like the frill on the one on the right, it's a much cleaner head and I'm alot happier with it.

En-raptored with geometrics


An experiment with hand painting geometric dinosaurs. I'm not 100% happy with the feet but the idea is sound and I'd like to apply it to a variety of other dino's.

The pale yellow halo is actually talc powder which I've used to transfer the outline of my design onto a black polo shirt. The method works really well but has the possibility of gumming up the paintbrush if too much powder is free to move. It brushes off easily once the paint is ironed though.

UFO extravaganza

I haven't posted in a long while due to a combination of crazy work hours, limited internet and a phone (camera) that's on the fritz. One major change in the last month is I've been housebound recovering from major organ surgery. As a result, I've had plenty of time to tackle my unfortunate collection UnFinished Objects. I've managed to clear at least one Australia Post tub of items. I'm pretty proud of this spring clean.

Sunday, 17 June 2018

Ajanta caves

In December last year I attended a friends wedding in Delhi. I had only 8 days for this trip as I was taking it between FIFO swings. After the wedding, my traveling companions and I headed south to see the Ajanta Caves. Previous blog posts (here  had outlined some of my arm chair research about the cave paintings so it was especially great to go see them in person. I cannot rave enough about this trip or about this UNESCO wonder. I am so in love with this wealth of history and the epic nature of these paintings.

If you want to know about the geology of Ajanta, some tid-bits can be found here. The posts following in the sequence will feature of some of the better photos I took plus a little background on the caves they're found in. I can't say this has been ticked off my 'places to see' list, but I've now seen enough to make the most of my next visit!

Me, thrilled to be seeing all the things!


Monday, 30 April 2018

Product review - Helmar Fray Stoppa

Product: Fray Stoppa
Brand: Helmar
Use: Stop loosely woven fabric from fraying.

Pros:
Helmar is an Australian company
Easily available from Spotlight.
Washable
Flexible

Cons:
Does absorb into fabric but some sits on top of the cloth
More of a glue texture, so it creates 'strings' which can be really annoying when working with silk etc.

3/5

Thursday, 1 March 2018

Block printing experiments

Last year I was on a secondment to a new team. They're all lovely people and continue to be very supportive of my learning curve. One of the benefits of being part of this team is unrivaled access to spare B bags. B bags are used to house the secondary chip samples from RC drilling. These samples are stored in large barrels in the event that an error occurs at the labrartory when assaying the A sample. Every so often, we make a duplicate sample to validate the lab process. This creates spare B bags. As a result, they are used for all sorts of things, from wiping the mud of vehicles, to temporary sun shades. The B bags are made of calico and sized with a water-resistant starch of some kind.


Friday, 16 February 2018

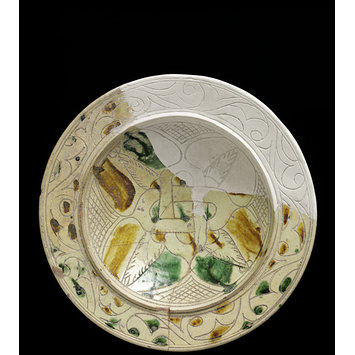
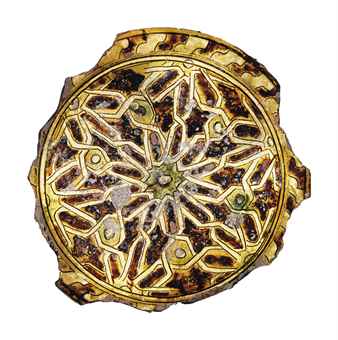
Some Sancai things I really like


Sancai refers to a glazing tradition from China's Tang dynesty (~600-900 CE) which utilises green, purple and brown glaze. The glaze is lead based laid on white earthenware items. Due to the mobile nature of the glaze, if often has carved borders to assist in retaining the glaze. Some scholars suggest the Chinese dishes influenced the sgraffito work of Europe.
The final image in this post indicates that even when the art forms of glazing was highly refined, the translucent green was utilized despite it's dubious nature.

Sunday, 28 January 2018

UFO - Mr. Men dress upgrade

I've just finished upgrading this UFO. I made this dress from a tennis dress pattern in 2004/5 (specifics are faint). The fabric came from a reclaimed bedsheet and as you can see, I was more concerned with conserving fabric than matching the print.

I love this dress but I had made the hem a little short. Luckily, in my fabric conserving spirit I had made the hem very wide. So, I was able to unpick it and lengthen the dress by a good 10cm. Unfortunately, wear on the hem had left pale lines in the print. I solved that through the application of trim (which probably cost more than the original fabric). The green trim covers the original hem line and the blue covers the fold.

If I had a do-over, I'd pattern match and maybe flare the skirt a bit more. That said, I still have the other bed sheet in the set, I could make another once my UFO stack is  down to a more manageable size. It'll have to wait though, my two UFO complete per one new project is going well and I'm looking forward to tackling some ceramics next.

Thursday, 18 January 2018

Yellow bugs in Western Australia

Fuzzy yellow caterpillar photographed around Leederville, Perth.

Cleaning up images my phone and I found this critter - a Trichiocercus sparshalli. This fuzzy caterpillar turns into a white / silver moth. Apparently they can be found across Australia but the eastern states are more likely to have the red sub-species.

A bee drinking goerthite stained water - tiny tongue (proboscis)!

With water in the Pilbara being so scarce, if the local hive finds a readily available source, they all turn up for a drink. I strongly advise capping all drinks and using sippy straws to avoid the bee-in-the-mouth issue.

Tuesday, 26 December 2017

Purple flowers in the Pilbara

I'm pretty confident this is a Solanum variety. Possibly Solanum lasiophyllum as it's leaves are more fuzzy than the orbiculatum.

Wednesday, 1 November 2017

Crafting with paper lanterns

Every steampunk party requires appropriate decorations. My lovely hosts had everything covered which meant I could spend an hour or so modifying a bunch of paper lanterns to create dirigibles. The annoying thing about the lanterns is the wire frame is a spiral, so the supporting 'rope' always looked a little wrong on one side.

No boat? DUPLO to the rescue!

Tea-light holder, wrapped in twine with some tiny weight out of sackcloth

Left over wedding jar and a Death Star that just happened to be lying around. The lines of the 'ropes' aren't quite right but my resources were limited.

The party was fantastic and the company delightful. I especially liked the colour-coded cocktails in their lovely teapots and the test tube glasses. The propaganda posters were also most excellent.

Thursday, 14 September 2017

Pilbara wildflowers


I have no idea what species these flowers are, but they are a beautiful splash of colour in an otherwise red and dusty environment.

Monday, 28 August 2017

Pennsic block printing haul - follow up

Remember my block printing haul from Joann's? I've started experimenting with them. The blocks are carved wood with the print surface sealed in a white (oil?) based paint. I had assumed this was the make the carving on the block easier to see for potential buyers but now I've experimented, I can see this has an interesting application. The white paints stops the wood from absorbing any of the paint so it doesn't dry out too quickly. Only a certain amount of paint will adhere to the shiny block reducing buildup concerns. Additionally, with my paintbrush-paint application method, paint collects around the edges of the block resulting in a darker outline for the shape. It could be quite effective if utilised properly.

Experimenting with design layout.

Sunday, 20 August 2017

First time using a pottery wheel

At Pennsic, I made a thing!!

Under the expert direction of Master Simon I made a howl. I threw it using a foot powered wheel and then it was fired onsite at Pennsic. I tried to decorate it like a 14th Spanish example but the glaze was not really cooperating. So proud of myself. It did develop a crack because the base was a little too thick and it dried slower than the rest of the pot.

Bottom right - Post throwing; top right - post glazing; left - post firing.


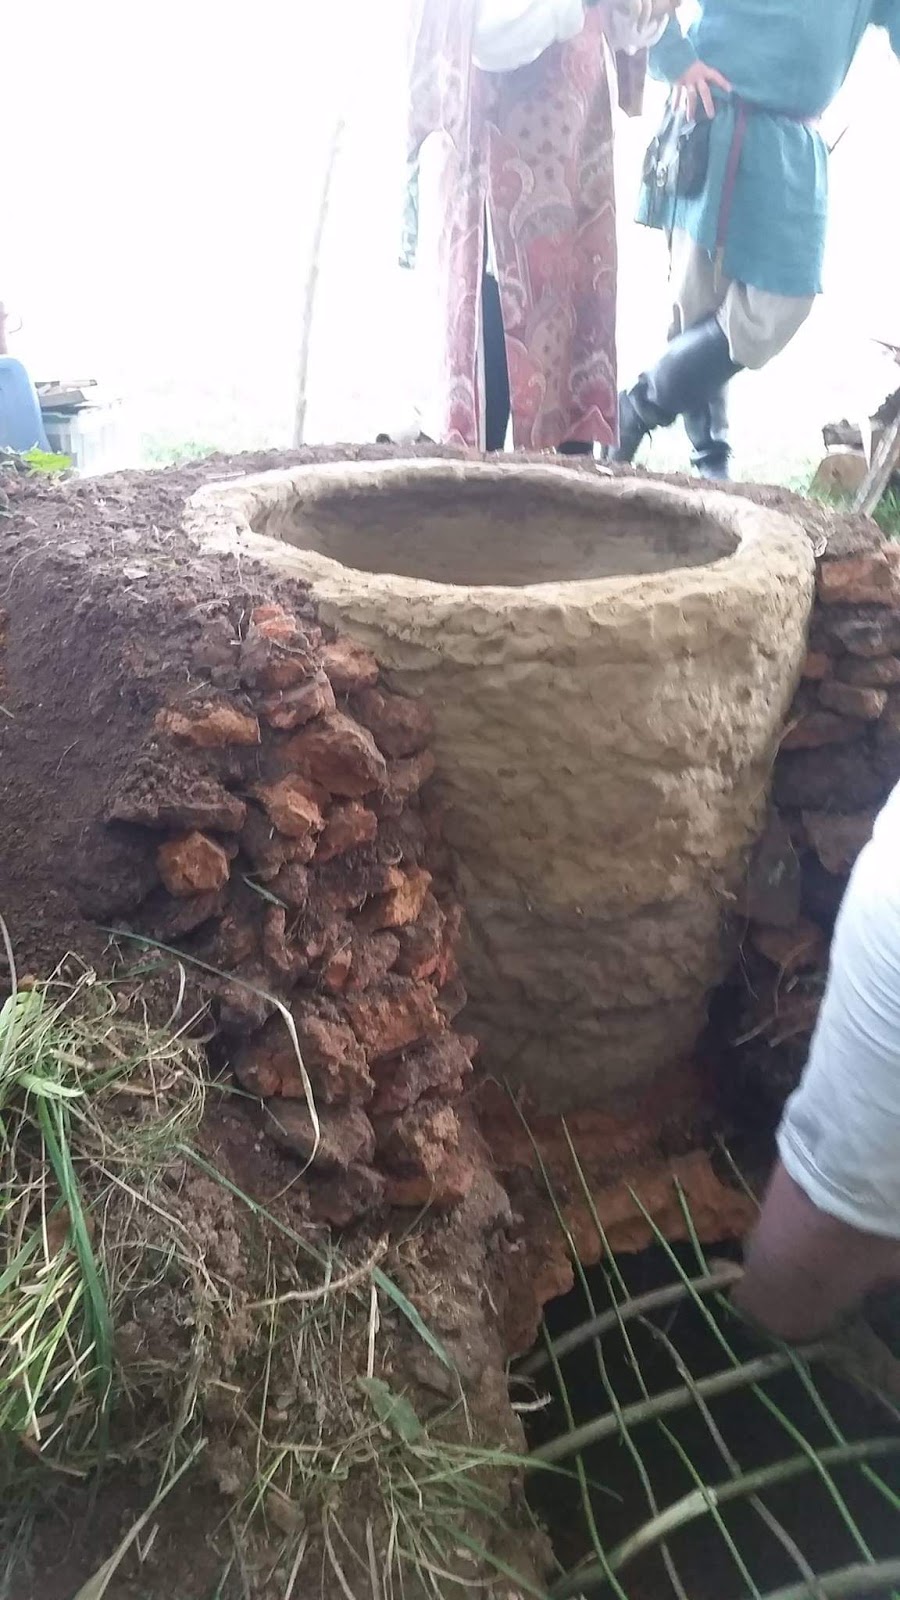
This is the half built woodfired kiln which is constructed onsite from Pennsic clay to fire all the things. :)


Thursday, 10 August 2017

Pennsic block printing haul

As you can tell from the recent flurry of posts, I attended Pennsic again this year. I also took the opportunity to goto Joann's. For those, like me, who reside in Australia, think of it as a cross between Spotlight and Bunnings for crafty things. Unlike Spotlight, Joann's store space is mostly taken up by craft supplies rather than home decorating items. I couldn't resist acquiring some cheap supplies for my block printing quest even though I was nearly at my baggage limit.


The haul includes 7 blocks - the three loose ones I got from a stall in Pennsic proper. I'm a little dubious about the pinkish rubber stamp as it's designed for ink/cards. I worry it won't be able to carry enough paint to be able to depict the fine details. If I thin the paint, it's likely to run into the fabric so it'll take some careful experimentation.

I also bought a rainbow of fabric paint colours. These were especially awesome, as I'm finding it hard to source a range of fabric paint colours in Australia. I decided to go with small bottles as the bigger bottles put my weight limit at risk.

Stay tuned for experimental updates!

Wednesday, 9 August 2017

Lino block printing - initial experiments

*NB: this post has been set to publish itself two weeks after writing as it relates to gifts for people.
This week I've been teaching myself how to carve lino and block print fabric. I've been using 15x15cm pseudo-lino squares for my initial trials. My local art store didn't stock lino or lino substitutes however Officeworks will allow you to order them for next day pick up. Each square costs $6.50 which isn't too bad. I've also bought a 5 pack of basic carving tools, a V, two U shapes and two different straight blades for $10 from the craft-store.
I started with flowers because a) organic shapes are easier to hide mistakes on and b) i needed a Hawaiian print viking dress and had no Hawaiian fabric. 

The blue rubber is pretty easy to carve and doesn't have a grain so you can make smooth circular shapes quite easily. I've mostly used the V tool for the lines, and the U tools for carving away waste. I quickly realised that since I hadn't bought a roller and my previous sponge experiments didn't work well, I was going to have to paint the paint onto the lino before printing. It's a bit tedious and can be stripy but in a pinch, it works. I also learned to cut away as much of the waste as I could to remove the possibility of accidental printing around the edges.

This pirate fox fabric is for Ceara. I think it fits nicely with her fencing and love of foxes. I hope she likes it.

More details, and early learnings on my next update!